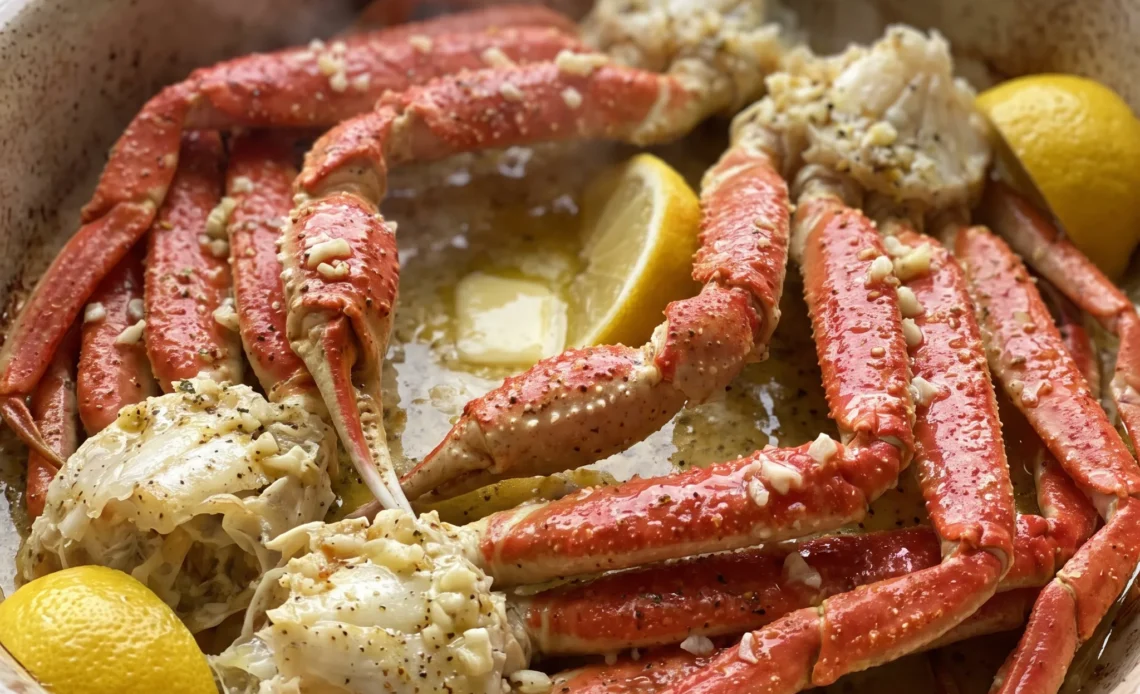
Overcooking is the usual failure with snow crab legs at home, and it happens because people treat them like raw shellfish that need real time in the heat. Most packages are already cooked, so the oven is only warming meat that was fine when you bought it, and a few extra minutes pushes it from glossy to stringy. That narrow window is the whole trick to oven baked snow crab legs, and it’s why the garlic butter goes on before the pan ever sees heat: the fat carries the seasoning into the shells while the meat heats, so you get flavor through the bite instead of just on top.
Get the timing close and the meat slides out in whole pieces, which is the only test that matters.
Snow crab leg meat is composed of delicate muscle proteins that tighten and expel water when heated past the point of doneness. Pre-cooked legs only need to be warmed through, so a short bake at 400°F reheats them without driving off moisture.
Raw legs, by contrast, must reach a safe internal temperature, which requires the longer bake time the recipe specifies. Using the pre-cooked timing on raw legs leaves the meat undercooked and translucent, while using the raw timing on pre-cooked legs turns the meat dry and rubbery.
Pre-Cooked or Raw? How to Tell and Why It Matters
Snow crab legs come to the store in two states, and the label tells you which one you’ve got. Pre-cooked legs have already been through a kettle, so the meat inside is done.
Your oven is only reheating them, and that takes very little time. Raw legs, sometimes sold as green or fresh, still need to be cooked through.
They require longer in the heat so the meat firms up and turns opaque. Check the packaging before you plan dinner.
If it says pre-cooked, you’re on the fast track. If not, give it more time. Pull pre-cooked legs too late and the meat turns rubbery and dry, because you’re driving off moisture that was already at its peak.
Undercook raw legs and the meat stays translucent and clingy, with a texture that’s unpleasant to eat. One look at the package saves you from either outcome. When they come out right, the meat slides from the shell in big, juicy chunks.
That’s your cue to serve.
Why Divide the Butter Between Baking and Dipping?
Butter does two jobs here, and splitting it keeps both. Scatter some over the crab before it goes in the oven and it melts down through the crevices, carrying garlic and lemon pepper with it. That butter bastes the meat as it heats, so every bite picks up richness you couldn’t get from dipping alone.
The rest stays out for the table. Melted butter on the side lets each person decide how much they want.
Some like a light swipe, others want a full dip. If you used all the butter in the oven, you’d miss that finish, and the crab would eat drier.
If you saved it all for dipping, you’d lose the baked-in flavor that makes the meat taste seasoned all the way through. A quarter cup each way is the balance. When you pull the pan out, the crab should look glossy and smell like toasted garlic.
Serve the extra butter warm so it coats the meat instead of sitting in a pool.
The Two Jobs of Lemon in This Recipe
Lemon shows up twice because heat changes what it does. Juice from one lemon goes over the crab before baking.
That acid cuts through the butter and keeps the richness in check, so the meat tastes bright instead of heavy. As it bakes, the lemon juice softens and blends with the garlic and butter, leaving a mellow note that’s more background than punch. The second lemon gets cut into wedges and passed at the table.
That’s where you get the fresh, sharp citrus that only raw lemon can give. A squeeze over the hot crab wakes up the whole bite.
If you only used lemon at the end, you’d miss the depth it adds during baking. If you only used it before, the finish would feel flat.
Both stages earn their place. After baking, the crab should smell like garlic and warm citrus.
The wedges on the plate let everyone adjust. That’s the move.
Seasoning Snow Crab Without Overpowering It
Snow crab meat is sweet and briny on its own, so heavy seasoning buries what you paid for. Lemon pepper is the right call because it brings citrus and a mild peppery kick that lifts the crab without shouting.
Minced garlic adds a savory aroma that rounds out the butter, but it stays in the background. You won’t taste raw garlic here. It mellows in the oven and leaves a warm note that makes the meat taste richer.
Salt is unnecessary. The crab comes from salt water, and lemon pepper already carries salt. Add more and you’ll taste nothing but seasoning.
The goal is to taste crab first, then butter, then a hint of garlic and lemon. When you pull the pan from the oven, the meat should look glossy and smell like a garlic butter sauce. A light dusting is all it takes.
Trust the crab to do the rest.

What to Look For in the Crab, Lemons, and Butter
Snow crab legs: Buy a 24-ounce package of pre-cooked or raw legs and check the label, because that determines your oven time.
Lemons: Choose two firm lemons with thin skin, one for juice and one for wedges at the table.
Butter: Use real butter, not margarine or spread, and keep the full 1/2 cup divided between basting and dipping.
Garlic: Minced garlic from a jar works, but fresh cloves you mince yourself have a sharper bite that mellows in the oven.
Lemon pepper seasoning: Lemon pepper already contains salt, so taste a pinch before you consider adding any more.
How to Tell When Snow Crab Legs Are Done in the Oven
Judging the color and texture of pre-cooked crab legs
Pre-cooked legs are already done, so you’re only reheating them. In the 5 to 7 minutes they’re in the oven, watch for the shells to turn bright red and the meat to look opaque and glossy.
If the meat starts to look dry or stringy, you’ve gone too far. Pull them out as soon as they’re hot, and check by touching a piece: it should feel firm but still juicy.
Overcooking makes the meat rubbery, so err on the side of less time.
Knowing when raw crab legs are cooked through
Raw legs need 10 to 15 minutes at 400°F. The meat should turn from translucent to opaque white and feel firm to the touch.
If it’s still clingy or looks glassy, give it a couple more minutes. But don’t let it go too long, or the meat will dry out. The best test is to peek into a thick part of a leg: when it’s opaque and flakes easily, it’s done.
Reading the butter and garlic for doneness cues
As the crab bakes, the butter melts and mixes with the lemon juice and garlic. You want the butter to be melted and bubbling slightly, but not browning.
If the garlic starts to darken, the oven is too hot or the crab is too close to the element. That bitter garlic taste will carry into the meat. If you see it happening, pull the pan out early and check the crab; it’s likely done.
Checking for even heating and avoiding dry spots
Crab legs come in different thicknesses, so some parts cook faster. After the minimum time, feel the thickest part of a leg: it should be hot all the way through. If some spots are still cool, rearrange the legs and give them another minute or two.
But watch closely, because thin legs can overcook quickly. The goal is to get everything hot without drying out any piece.

Oven Baked Snow Crab Legs with Garlic Butter
Ingredients
Method
- Set oven to 400°F (205°C). Use foil to line a shallow, rimmed sheet pan.
- Arrange thawed crab legs in an even layer on the baking sheet. Evenly distribute the juice of 1 lemon and the minced garlic over them. Slice 1/4 cup (4 Tbsp) of butter into small pieces and scatter them evenly atop the crab legs. Finally, evenly dust the crab legs with the lemon pepper.
- If using pre-cooked crab legs (as indicated on packaging): Bake, uncovered, at 400°F (205°C) for 5-7 minutes.
- If using raw, uncooked crab legs: Bake at 400°F (205°C) for 10-15 minutes.
- Serve immediately while hot, accompanied by extra lemon wedges and melted butter for dipping.
Where Swapping Works Here, and Where It Sinks the Dish
Butter: For dairy-free, swap in a plant butter stick that melts and browns like the real thing, keeping the full 1/2 cup split the same way: 1/4 cup for the pan, 1/4 cup for dipping. Skip tub spreads and margarine. They carry water and emulsifiers, so they never melt into a clean pool, and the crab sits in a wet slick instead of getting basted.
Real butter carries the garlic and lemon pepper down into the shells and leaves that glossy finish. A decent plant stick comes close enough that most people won’t flag it. A watery spread thins the coating, and the meat tastes steamed rather than seasoned.
Lemon pepper seasoning: No lemon pepper on hand, mix 1 1/2 teaspoons of cracked black pepper with the zest of half a lemon and a pinch of salt. Taste a pinch before it goes on the crab, because store blends vary wildly in salt.
You lose the rounded citrus note the blend carries and gain a sharper, more floral edge from fresh zest. The peppery heat reads brighter, so use a lighter hand if your crowd dislikes bite.
Fresh garlic: Jarred minced garlic works in the same 2 teaspoons. Garlic powder is the one to avoid. It scorches faster than fresh and turns bitter against the hot pan.
Jarred garlic tastes flatter and slightly sour next to a fresh clove, but the oven mutes most of that difference. The crab still comes out smelling like garlic butter.
Lemons: Bottled lemon juice can stand in for the baking lemon, but start with the same amount the recipe uses, about 3 tablespoons, then adjust after you taste the pan juices. Keep a real lemon for the table wedges. Bottled juice tastes duller and carries a faint metallic edge that heat pulls forward.
The baked crab loses some of its brightness, though the fresh wedges at the table cover most of the gap.
Storage, Reheating, and the Serving Window
Eat baked snow crab legs as soon as they come out of the oven. The meat hits its best texture while hot, firm but still juicy, and it slips from the shell in clean pieces. Once it cools on the pan, the meat tightens and starts to dry, and reheating can’t fully bring back what heat drove off.
If you have leftovers, pull the meat from the shells first. Store it in a sealed container in the fridge for up to two days. The shell does nothing for the meat once it’s chilled, and picking it cold is slow work.
Cold crab loses its gloss and turns slightly firm, which is normal. To serve a stored portion, warm it gently in a covered skillet over low heat with a spoonful of the reserved melted butter, just until hot. High heat toughens the meat.
Don’t freeze leftovers; the thawed meat goes watery and stringy. Melt the dipping butter right before you eat, and squeeze the lemon wedges over the hot crab at the table, not ahead.
Tips
- Thaw frozen crab legs in the refrigerator overnight, or if you’re short on time, submerge them in a bowl of cold water for 20 to 30 minutes, changing the water once. A partially frozen leg holds cold in its center, so it needs longer in the oven than the 5 to 7 minutes for pre-cooked crab while the thinner legs around it dry out.
- Arrange the legs in a single layer with the thickest sections toward the center of the pan and the thinner tips near the edges. The center of a sheet pan runs hotter than the corners, so putting the meaty knuckles there evens out the heat, and any leg that overlaps another will steam instead of roast where they touch.

Frequently Asked Questions
Can I bake snow crab legs ahead of time and reheat them later?
Bake them the day you plan to eat them. Once the meat cools, it tightens and sheds moisture, and reheating can’t bring back the texture it had hot from the oven.
If you must, pull the meat from the shells while it’s still warm, store it in a sealed container in the fridge for up to two days, then warm it gently in a covered skillet over low heat with a spoonful of the reserved melted butter, just until hot. That gets you hot crab, but not the same clean, juicy pull you get straight off the pan.
How do I know if my snow crab legs are pre-cooked or raw?
Read the package. The label will say pre-cooked or cooked, or it won’t, and that tells you which set of legs you’re holding. If the label is missing or vague, look at the meat through a crack in the shell: pre-cooked meat is opaque white, raw meat is translucent and clings to the shell.
That distinction decides your oven time, so settle it before the pan goes in.
Why did my snow crab legs turn out dry and rubbery?
You left them in the oven past the point where the meat was hot. Pre-cooked legs are already done, so every extra minute drives off moisture they can’t get back, and the meat goes from glossy and firm to stringy and tight.
Next time, pull them as soon as the shells are bright red and the meat looks opaque and glossy, usually around 5 to 7 minutes. If your legs were raw, the same rule applies, just with a longer window: 10 to 15 minutes, and check a thick part early.
A pan that’s too crowded can also steam them instead of baking, so keep the legs in a single even layer.
What should I serve with oven baked snow crab legs?
Something that can soak up the garlic butter and lemon that pool on the plate. Crusty bread, a plain baked potato, or steamed rice all work because they stay neutral and let the crab stay the main event. A crisp green salad with a sharp vinaigrette cuts the richness between bites.
Keep the sides warm and simple; the crab is already seasoned, so you don’t need another loud flavor on the table.
How is this oven-baked method different from the classic boiled snow crab legs?
Boiling cooks the crab in water, which dilutes the flavor and leaves the meat wet. Baking at 400°F lets the butter, garlic, and lemon pepper cling to the shells and baste the meat as it heats, so the seasoning stays put instead of washing away. The result is a glossier, more concentrated bite with a toasted garlic smell.
It also gives you a dry, hot pan instead of a pot of water, which means the crab goes straight to the table without draining.
