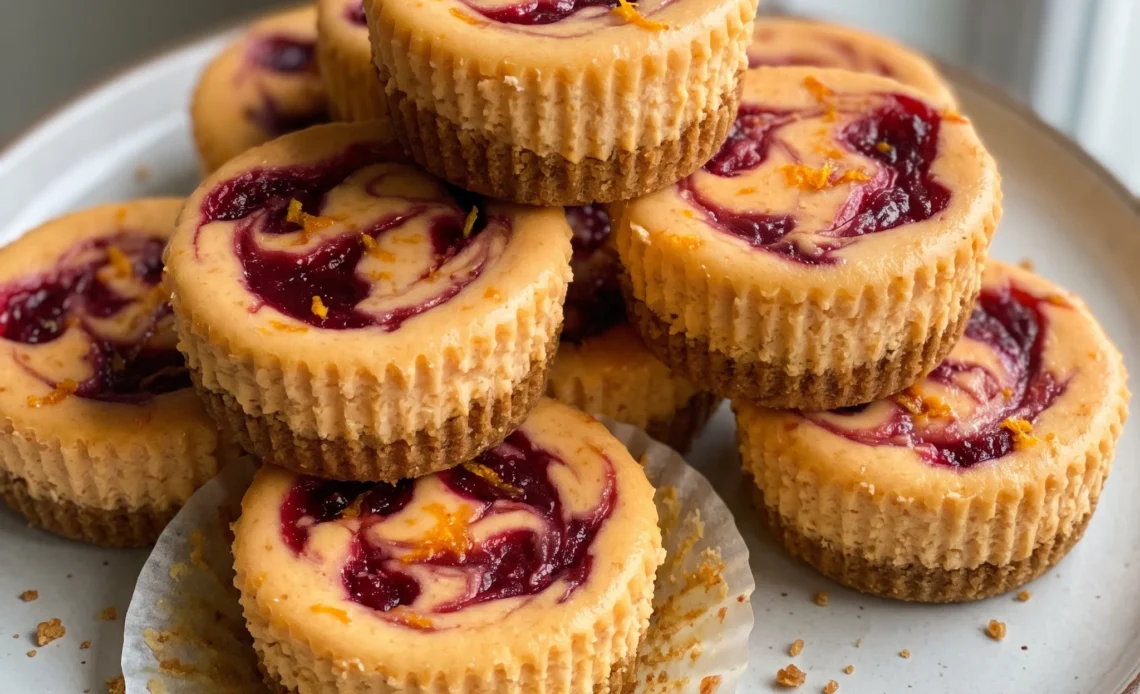
Yes, you can bake a whole holiday cranberry orange cheesecake into cupcake liners, and the reason it works is the size itself. A small volume of custard sets fast and evenly, so the tops come out smooth without the water bath a full-sized cake needs, and each one carries its own crust, its own swirl, its own ratio of tart to sweet. The trade is attention: these minis go from just set to overbaked in a couple of minutes, and the centers should still wobble when you pull the pan.
Made as mini cranberry orange cheesecakes, they serve a crowd straight from the tin, no slicing, no plates, no crack down the middle of the first cut.
Swirl the Puree for Ribbons, Not a Blended Pink
Spoon the cranberry puree over the filled liners, then draw a toothpick through it just two or three times. That brief pass leaves streaks and pockets of deep red against the pale batter.
Mix it in fully and you lose that contrast, ending up with a uniform blush color and a single flat flavor. With the swirl, one bite hits tart cranberry, the next is mostly sweet cream, and the next catches both. The puree holds its shape during baking because the cornstarch thickens it enough that it doesn’t dissolve into the surrounding batter.
You can see the difference before the pan even goes into the oven: distinct ribbons, not a smooth pink. Each mini cheesecake ends up with its own pattern, so no two are alike.
That variability is what keeps a plate of sixteen from tasting monotonous. If you want a consistent look, swirl less; for bolder pockets, swirl more. Either way, the fruit stays where you put it.
Skip the Water Bath for These Small Cakes
A full-sized cheesecake often needs a water bath to keep the top from cracking. Mini cheesecakes don’t. Their small volume means the custard sets quickly and evenly, so there’s less time for the surface to dry out and pull apart.
The batter also rises and falls less dramatically, which means less structural stress. Without a water bath, you avoid the fiddly step of wrapping pans and the risk of water leaking into the liners. The tops come out smooth and flat, or with just a slight dome, no cracks.
You still get the dense, creamy texture you want. The trade-off is that you can’t walk away during baking, but that’s a small price for the simplicity. These little cakes are forgiving enough that a water bath would be overkill.
The result is a clean, unblemished surface that looks intentional.
Pre-Bake the Crust so It Stays Crisp
Press the crumb mixture into the liners and bake it before the cheesecake batter goes in. That first trip to the oven sets the crust and drives off moisture, creating a barrier that keeps the batter from soaking in.
Without this step, the crust would absorb liquid from the raw cheesecake mixture and turn soft and pasty. Since the batter is added unbaked and then baked again, the crust needs a head start to stay firm.
A crisp base gives a clean snap when you bite through, contrasting with the creamy filling. You can test it by touching the crust after pre-baking: it should feel dry and set, not damp.
That texture holds up even after the second bake and chilling. The payoff is a distinct layer at the bottom, not a soggy sponge.
It’s a small extra step that makes a noticeable difference in the final bite.
Cool Gradually to Prevent Cracks and Sinking
When the cheesecakes are done, turn off the oven and leave the door ajar. The residual heat lets them cool slowly, which prevents the custard from contracting too quickly and cracking. If you pull them straight into a cold room, the sudden temperature drop can cause the tops to split or the centers to sink.
After the oven, let them sit at room temperature. That continues the gentle transition. Then refrigerate to set the final texture.
Each stage eases the cheesecakes down in temperature, so the structure stays intact. You’ll end up with flat, smooth tops and a uniform, creamy interior. Rushing the cooling might save time, but you risk a cracked surface that, while still tasty, looks less polished.
The slow approach is mostly hands-off, so it’s not extra work. Just let them follow the gradual path, and they’ll reward you with a flawless finish.
Orange Zest and Juice Build a Layered Citrus Note
Zest the orange into the cheesecake batter. The oils in the zest carry the bright, floral aroma of the fruit, and they spread through the whole mixture, so every bite has a hint of orange.
In the cranberry puree, orange juice adds both acidity and sweetness. That liquid complements the tart cranberries, rounding out their sharp edge.
Together, the zest and juice create a citrus backdrop that keeps the richness of the cream cheese in check. If you used only zest, the puree would miss that juicy lift; if only juice, the batter would lack the aromatic punch.
By splitting them, you get the best of both without watering down the batter. The classic pairing of cranberry and orange works here because the two fruits play off each other: one tart, one sweet, both bright. The result is a cheesecake that tastes lively, not heavy.
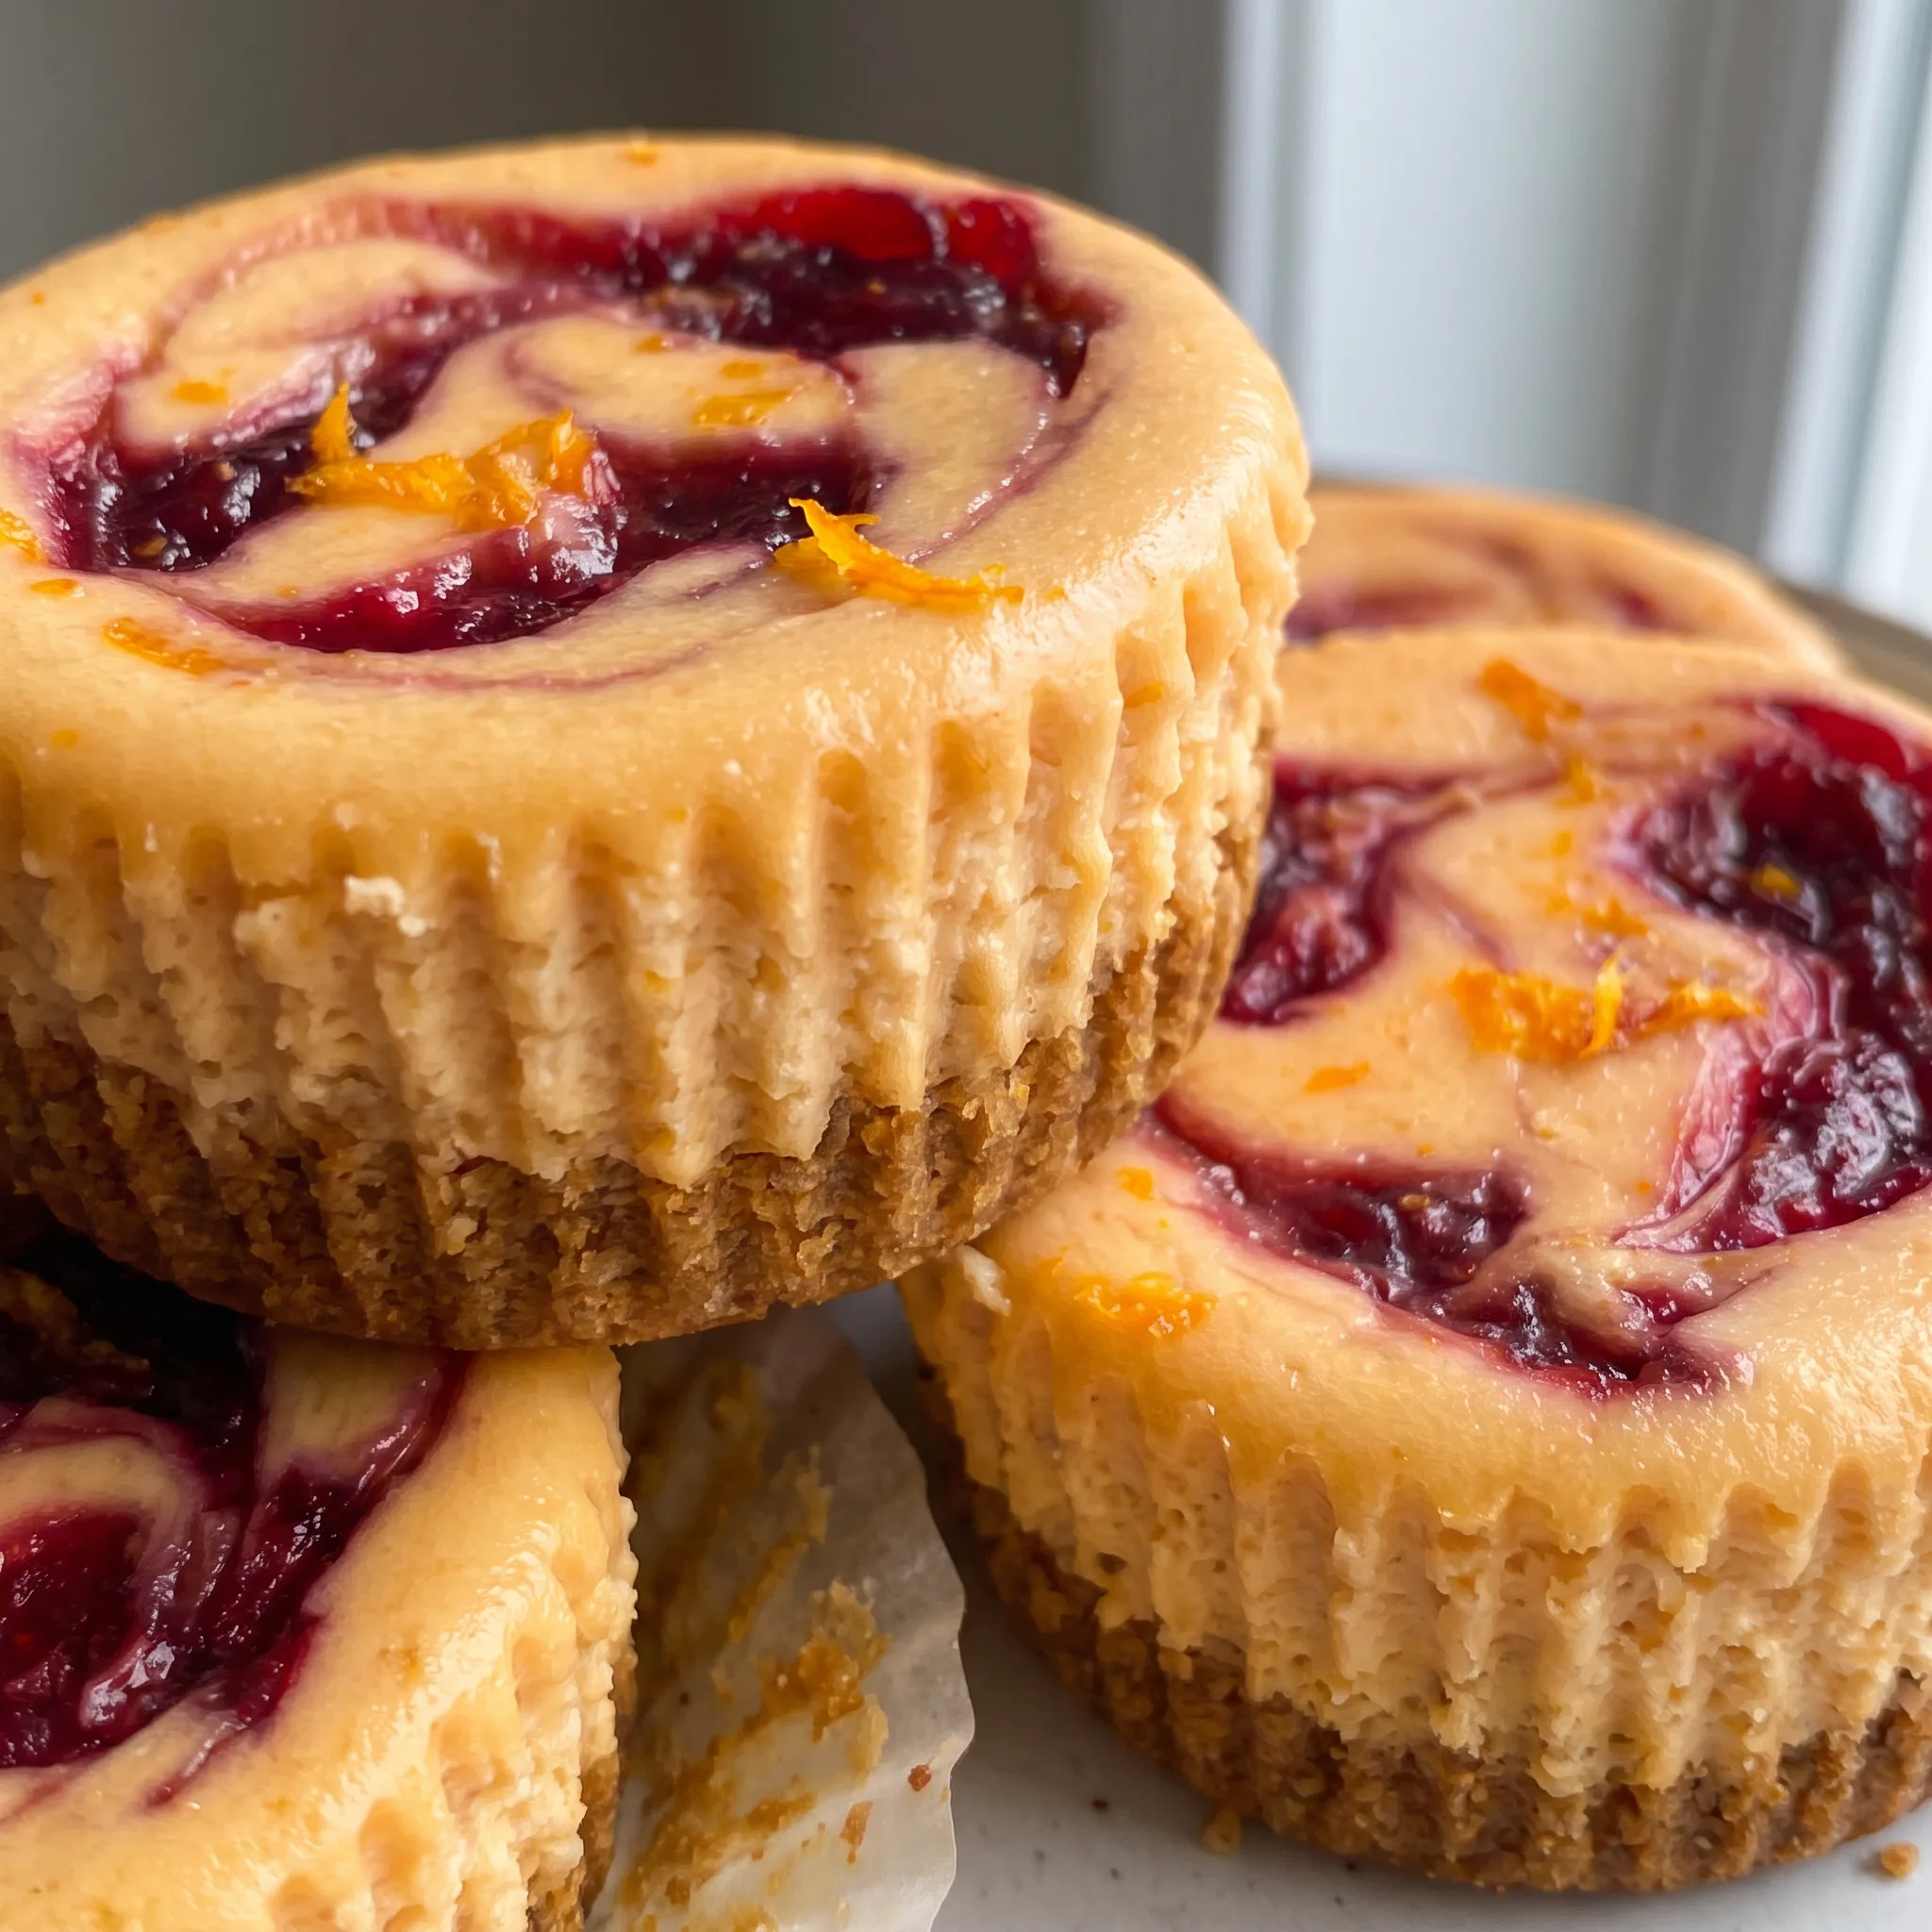
Pick the Right Crumbs, Zest, and Cranberries for These Minis
Cranberry orange biscotti crumbs: Their sweet-tart edge and coarse crunch set these apart from plain graham crumbs, though any of the listed options works.
Cream cheese: Full-fat blocks, not spreadable tub cream cheese, give the dense, creamy set these minis need.
Whole milk yogurt: Its tang and body keep the batter from tasting flat, and sour cream works just as well.
Orange zest: Grate only the outer colored peel; the white pith underneath turns bitter and ruins the citrus note.
Fresh cranberries: Choose berries that are firm and glossy, not shriveled or soft, so the puree tastes bright and tart.
Cornstarch: It thickens the puree so the swirl stays put instead of bleeding into the batter.
Cheesecake custard sets into a delicate protein gel; when it cools quickly, the gel contracts unevenly and tears. Two documented approaches exist: an immediate cold shock (refrigerator or freezer) or a gradual, staged cooldown.
The gradual method lets the custard pass through its fragile temperature range slowly, so internal stresses dissipate instead of concentrating at the surface. This recipe uses the staged cooldown, oven off with door ajar, then room temperature, then refrigeration, because it eliminates thermal shock without any extra equipment or risk.
Judging the Set, the Swirl, and the Crumb
When the batter is smooth enough to stop mixing
After adding the egg and vanilla, mix just until the last streaks of yolk disappear. Overmix and the batter turns thin and foamy, which bakes into a spongy, airy cake instead of a dense, creamy one. Stop while it still looks thick and glossy.
If you’ve already gone too far, let it sit for a minute; some bubbles will rise, but the texture won’t fully recover. The visual cue is a uniform color with no pale swirls.
Reading the puree’s thickness before it hits the strainer
As the cranberries simmer, they’ll pop and release juice. After you add the cornstarch slurry, the mixture should visibly thicken in 3 to 4 minutes.
Drag a spatula across the pan: if it leaves a trail that holds for a second, it’s ready. Too thin, and the puree will bleed into the batter and vanish. Too thick, and it won’t pass through the sieve.
If it’s still watery after 4 minutes, give it another minute, but watch closely; it can scorch.
The jiggle that tells you the cheesecakes are done
At 20 to 25 minutes, the edges will look set but the centers should still wobble slightly when you nudge the pan. That wobble means the custard is just set; it will firm up as it cools.
If the centers are already firm, you’ve baked them too long and the texture will be dry. If the whole surface ripples, they need more time.
Check at 20 minutes, then every 2 minutes.
Why you shouldn’t rush the cool-down
After you turn off the oven and leave the door ajar, the cheesecakes will continue to cook gently for 5 minutes. Then they sit at room temperature for 10 minutes. Skipping these steps and moving them straight to the fridge causes a sudden temperature drop, which can crack the tops or make the centers sink.
The slow transition keeps the surface smooth and the interior even. You’ll know it’s working if the tops stay flat and the cakes pull away from the liners just slightly.
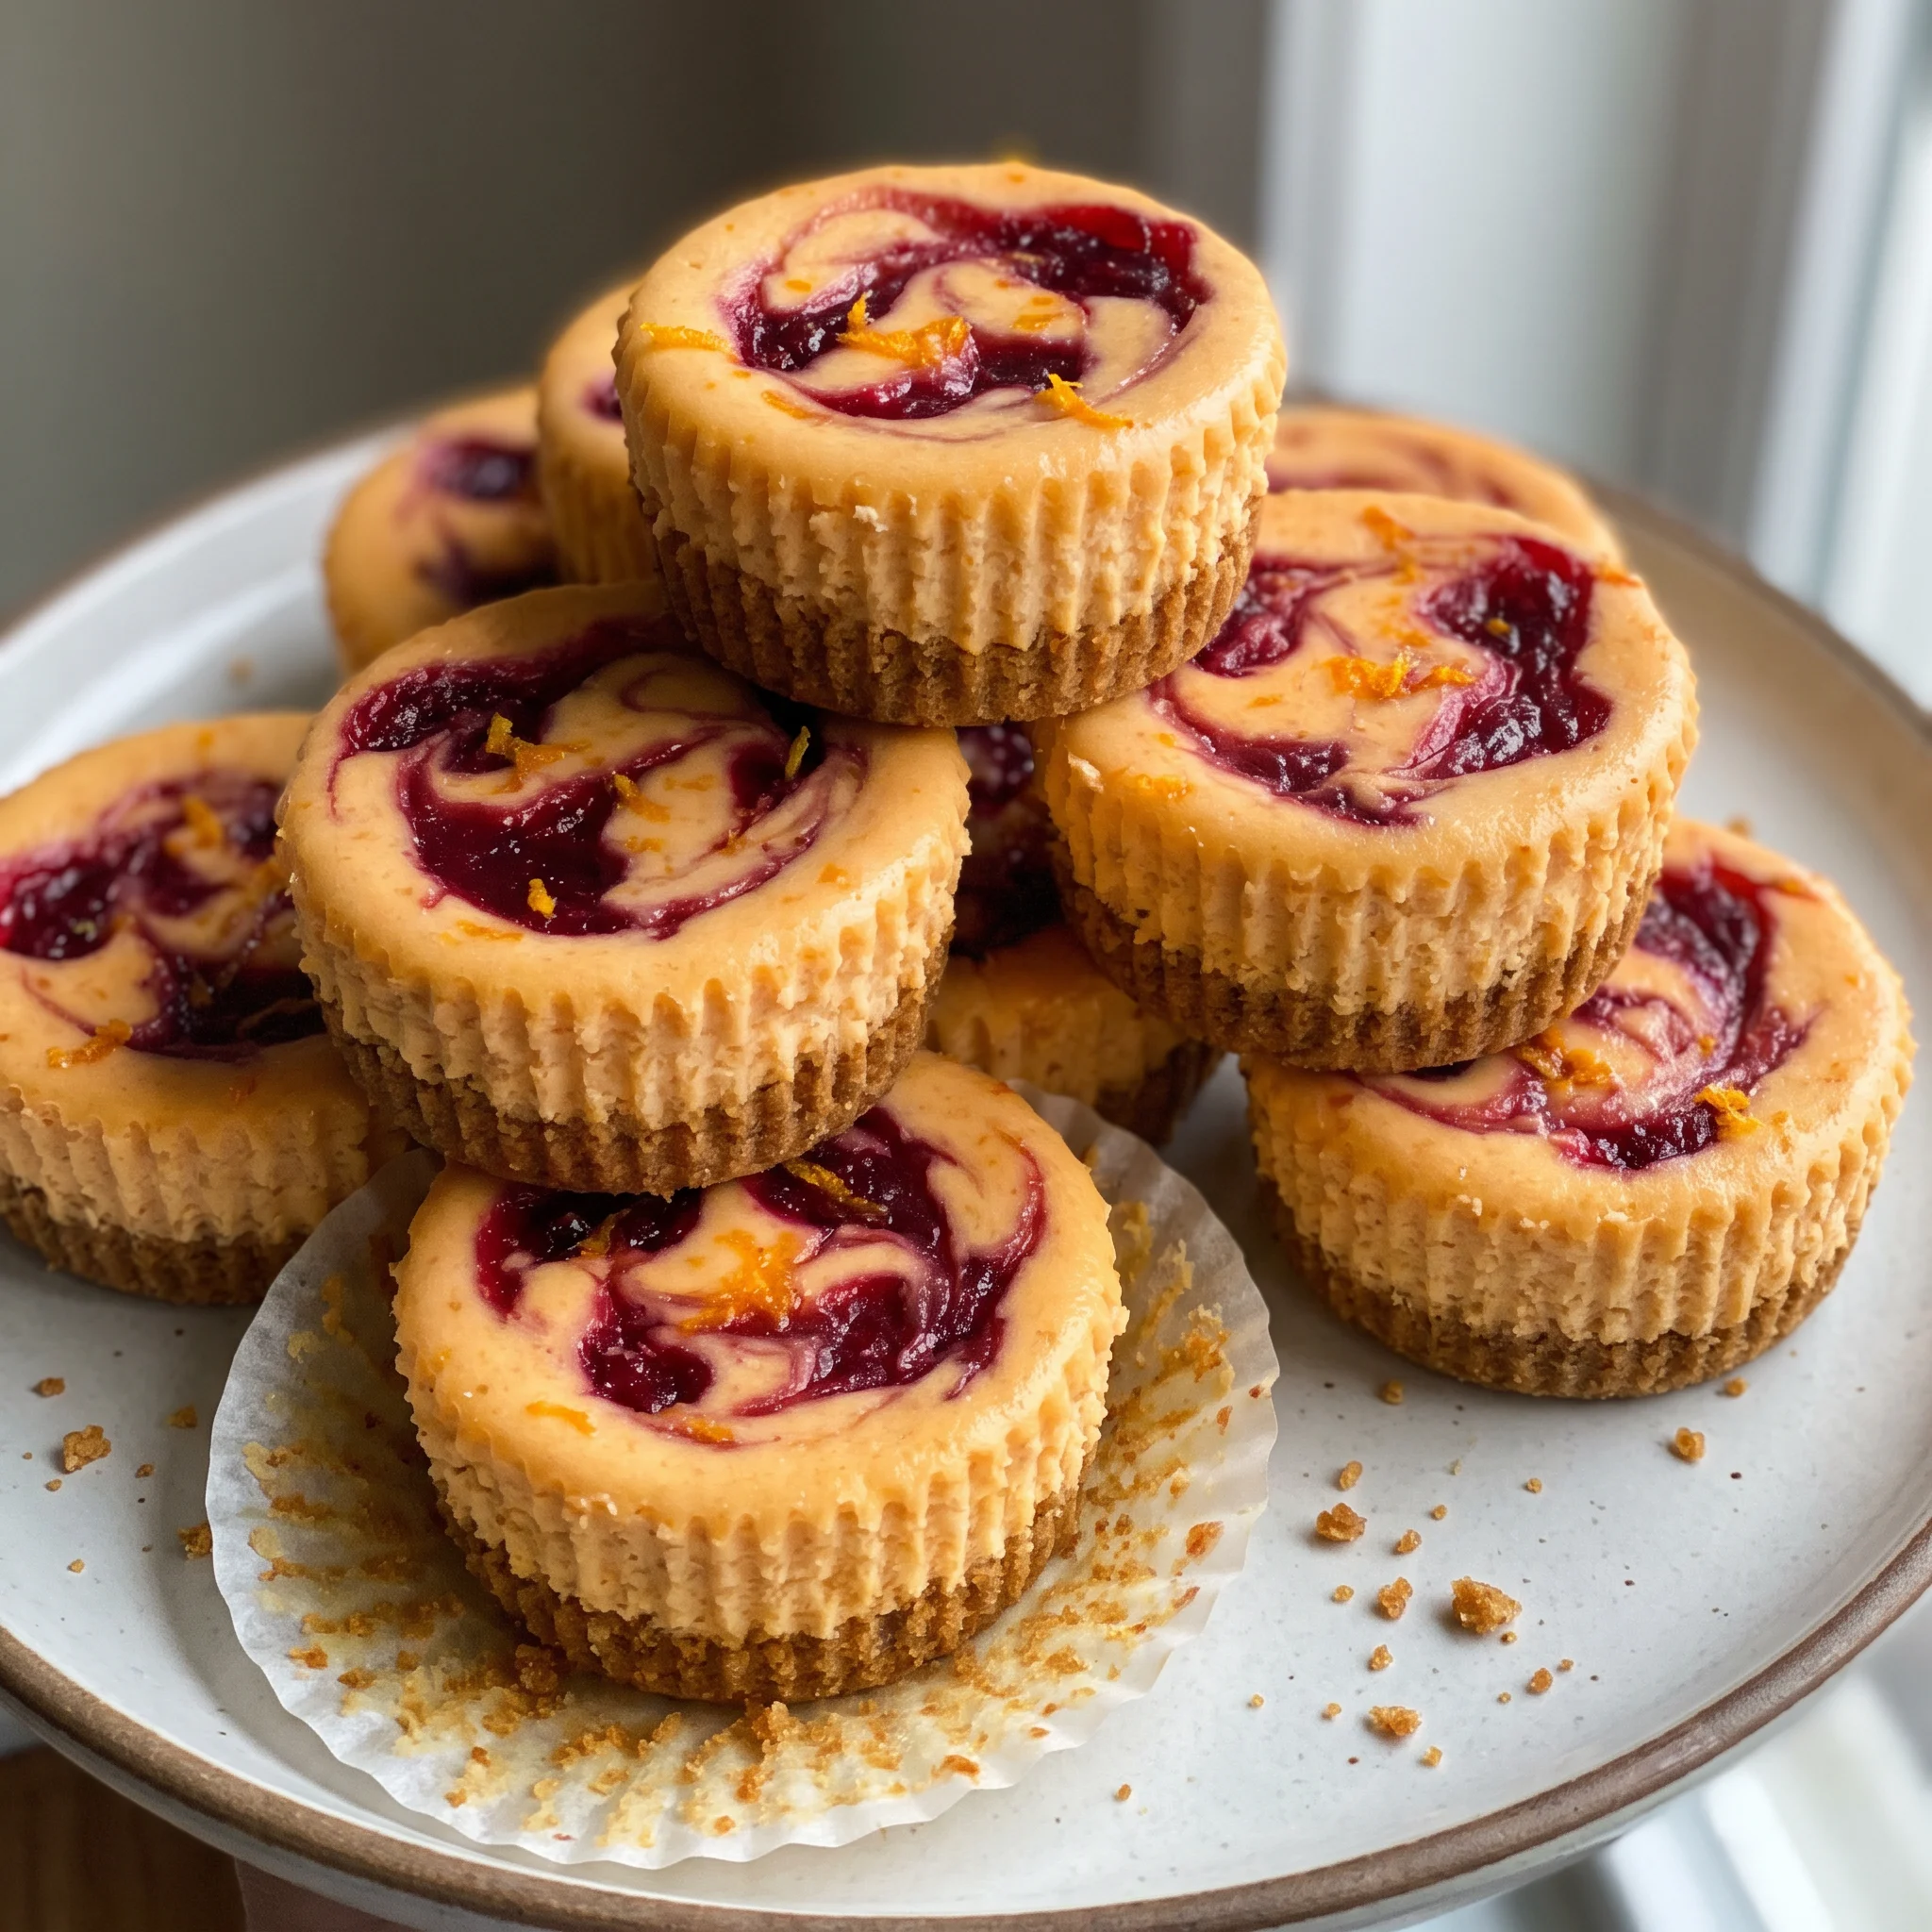
Mini Cranberry Orange Cheesecakes
Ingredients
Method
- Heat oven to 350°F (175°C). Place 16 paper cupcake liners into standard muffin tins; set aside.
- For the crust: mix the crumbs, melted butter, and sugar together. Firmly press 2 tablespoons of this mixture into the base of each liner. Bake for 6 minutes.
- For the cheesecake layer: with a stand mixer or hand mixer, blend the cream cheese, yogurt or sour cream, sugar, and zest until smooth and creamy. Incorporate the egg and vanilla extract; mix only until just combined.
- For the cranberry puree: in a small saucepan over medium heat, stir together the cranberries and orange juice. Bring to a boil and simmer for 5 minutes. In a small bowl, whisk the cold water and cornstarch until smooth; add to the saucepan and whisk to blend. Simmer for an additional 3–4 minutes. Take off heat and pass through a mesh sieve; throw away the skin and seeds.
- Fill each liner ¾ full (a little more is ok) with the cheesecake mixture. Swirl in ¾ teaspoon of the cranberry puree using a toothpick. Bake for 20–25 minutes or until the cheesecakes are set. Switch off the oven, leave the door ajar, and let the cheesecakes cool for 5 minutes inside. Take out of the oven and cool for 10 minutes at room temperature. Refrigerate to chill for 1 hour before serving.
Storage and Serving: Chill, Then Eat While Cold but Not Hard
These mini cheesecakes need at least 1 hour in the fridge to set before serving, but the best texture comes when you eat them within 4 to 6 hours of chilling. At that point they’re cold, firm, and creamy, the crust still crisp.
Left in the fridge longer, the crust softens as it draws moisture from the filling, and the swirl’s tart pockets mellow. They’re still fine for 2 to 3 days, loosely covered, but the contrast fades. For serving, let them sit at room temperature for 5 minutes; that takes the ice-hard edge off without letting them warm through.
The cranberry puree swirl is already baked in, so no finishing touch goes on later. If you want to get ahead, you can bake and chill them up to a day before, but add the final swirl right before baking as written. Freezing isn’t recommended; the dairy filling turns grainy and the crust goes soggy.
Swap the Crumbs and the Yogurt, but Leave the Cream Cheese Alone
Cranberry orange biscotti crumbs: Graham cracker, gingersnap, or shortbread crumbs, measured the same 1 cup. Biscotti brings a coarse, sweet-tart crunch and a hint of orange that echoes the zest. Graham crumbs are finer and honeyed, so the crust packs denser and tastes milder; gingersnap adds a spicy snap that pushes the cranberry in a holiday direction; shortbread is buttery and soft, almost melting into the filling.
All three hold up under the batter, but the crust’s character changes. If you use salted crackers, cut the added sugar to 1 tablespoon.
Whole milk yogurt: Sour cream, same 1/4 cup (60 g). Yogurt is tangy and a little lean, giving the batter a lighter, brighter edge. Sour cream is richer and less acidic, so the cheesecake tastes creamier and slightly less tart.
The set is nearly identical, though sour cream may make the texture a touch denser. If you want to keep the tang, stick with yogurt; for a more classic cheesecake flavor, sour cream is the move.
Cream cheese: Do not substitute low-fat, whipped, or spreadable tub cream cheese, or vegan cream cheese. This recipe depends on full-fat block cream cheese for its dense, creamy structure.
Low-fat or whipped versions contain more water and stabilizers, so the minis bake up soft and may not set properly; they can also weep or collapse as they cool. Vegan cream cheese often lacks the same fat content and may turn grainy or rubbery. If you need a dairy-free version, this isn’t the recipe to adapt.
Use the real block cream cheese, room temperature, and you’ll get the texture the recipe promises.
Granulated sugar: Same amount of packed light brown sugar, or 3/4 cup honey plus reduce the yogurt to 2 tablespoons. Brown sugar adds a molasses note that deepens the flavor and makes the cheesecake taste a bit like caramel; the texture stays creamy but the color darkens.
Honey is sweeter and more hygroscopic, so the batter will be looser; cutting back the yogurt helps balance the liquid. Expect a softer set and a distinct honey taste. If you try either, start with the same amount the recipe uses and adjust after tasting the batter.
Cornstarch: Arrowroot powder or tapioca starch, same 1/2 teaspoon. Both thicken the puree similarly, but arrowroot can break down if boiled hard, so keep the simmer gentle.
Tapioca starch gives a slightly glossier, stretchier gel. The puree will still hold its swirl, though the texture might be a touch more slippery. If you use either, watch the pan closely and stop as soon as the mixture coats the spatula.
Tips
- Let the cream cheese sit out for at least 2 hours, not just until it feels soft on the outside. A 16-ounce block straight from the fridge stays cool and firm at the center even after an hour, and that cold core is what leaves small lumps that never fully smooth out. Press the block with your thumb: it should give all the way through with no resistance. If you’re short on time, cut the block into 1-inch cubes and spread them on a plate; they’ll reach room temperature in about 30 minutes.
- Crack the egg into a small bowl and leave it on the counter while you make the crust and puree. The egg needs to be warm enough that it doesn’t seize the batter when it hits the cream cheese mixture. A cold egg drops the temperature of the whole bowl, which firms the fat back up and makes the batter look curdled right after you add it. If that happens, set the bowl over a towel of warm water for 30 seconds and stir; the batter will come back together.

Frequently Asked Questions
Can I make these mini cranberry orange cheesecakes ahead of time?
Yes, you can bake and chill them up to a day before serving, but add the final swirl of cranberry puree right before baking as written. The puree is already baked in, so there’s no finishing touch to add later.
For the best contrast between the creamy filling and the tart swirl, eat them within 4 to 6 hours of chilling. After that, the crust softens and the fruit pockets mellow, though they’re still fine for 2 to 3 days loosely covered in the fridge.
Why did my mini cheesecakes crack on top?
Most likely they cooled too quickly, either because you moved them straight to the fridge or skipped leaving them in the warm oven with the door ajar. That sudden drop in temperature makes the custard contract fast and split. The recipe’s gradual cool-down is designed to prevent exactly that.
As a secondary check, if the batter was overmixed after the egg went in, it can bake up airy and more prone to cracking. Stop mixing while the batter is still thick and glossy.
How do I know when the mini cheesecakes are done baking?
At 20 to 25 minutes, the edges should look set but the centers should still wobble slightly when you nudge the pan. That jiggle means the custard is just set and will firm up as it cools. If the centers are already firm, you’ve baked them too long and the texture will be dry.
If the whole surface ripples, they need more time. Check at 20 minutes, then every 2 minutes.
What’s the difference between these mini cheesecakes and a full-sized cranberry orange cheesecake?
Minis bake in a fraction of the time and don’t need a water bath, because their small volume sets quickly and evenly, so the surface rarely cracks. A full-sized version often requires that extra step to keep the top smooth.
You also get more crust per bite here, since each little cake has its own base, and the cranberry swirl stays distinct in every one. The texture is just as dense and creamy, but the smaller size means they chill and serve faster.
