
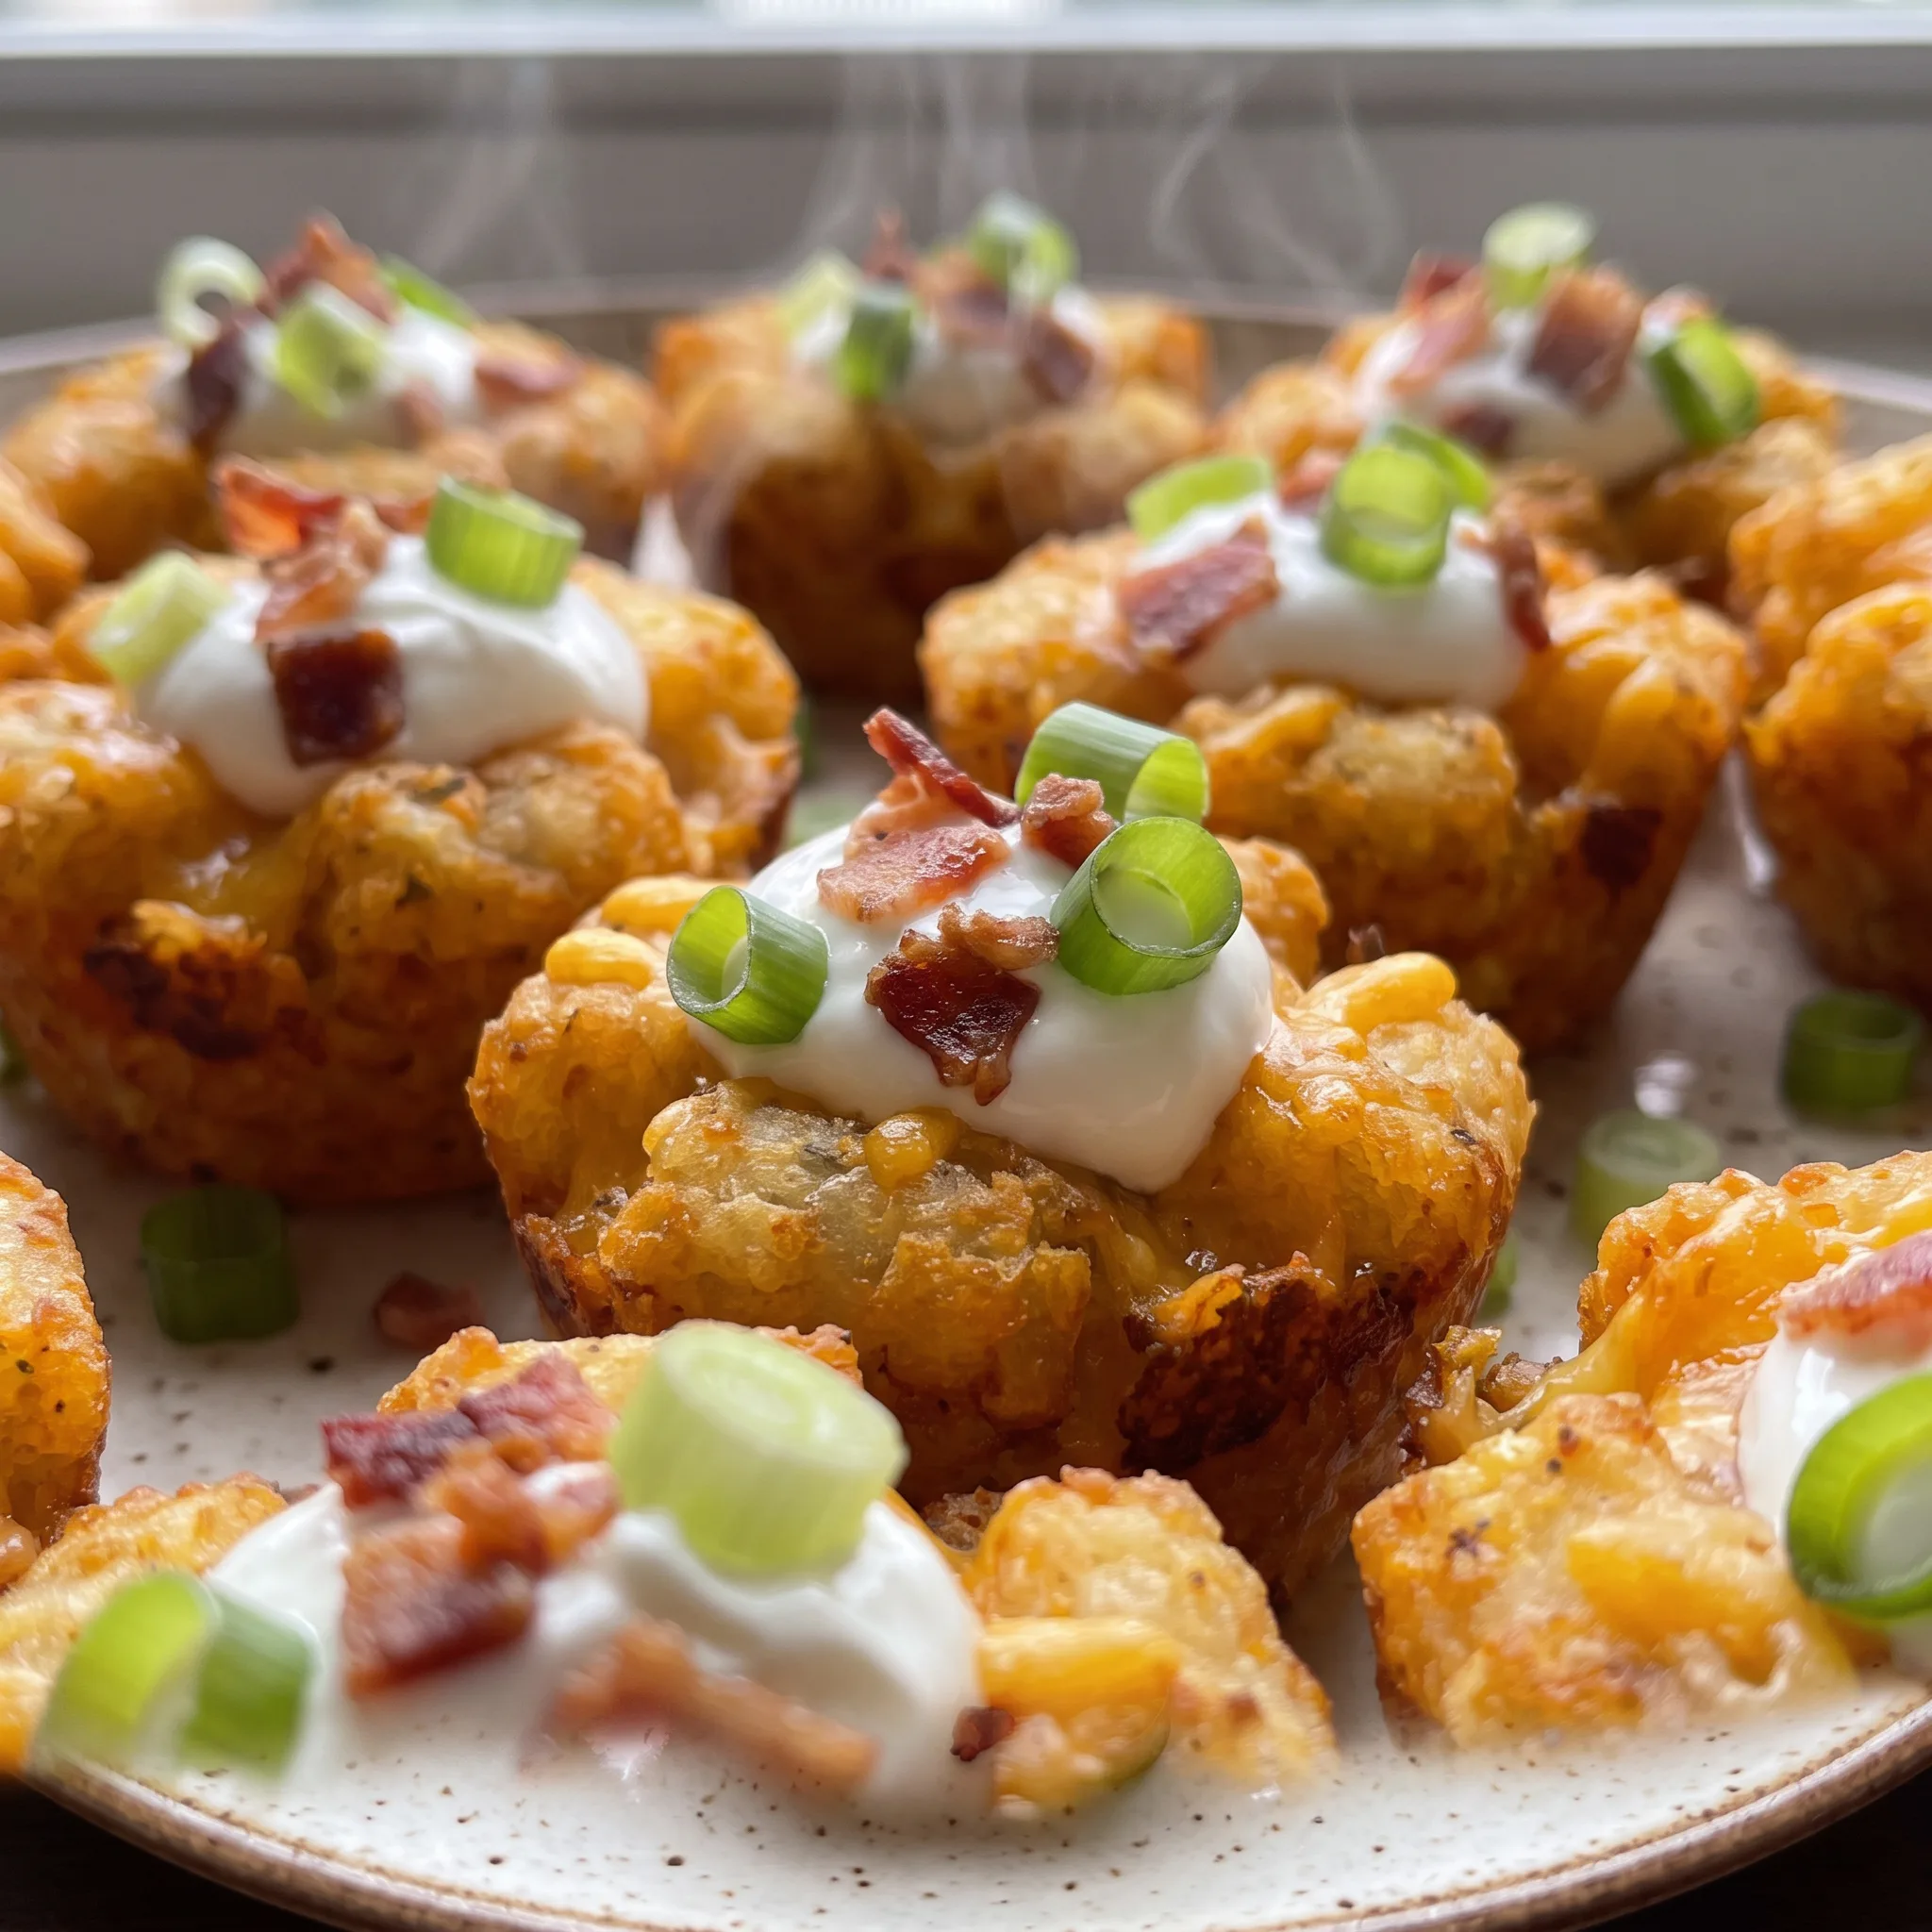
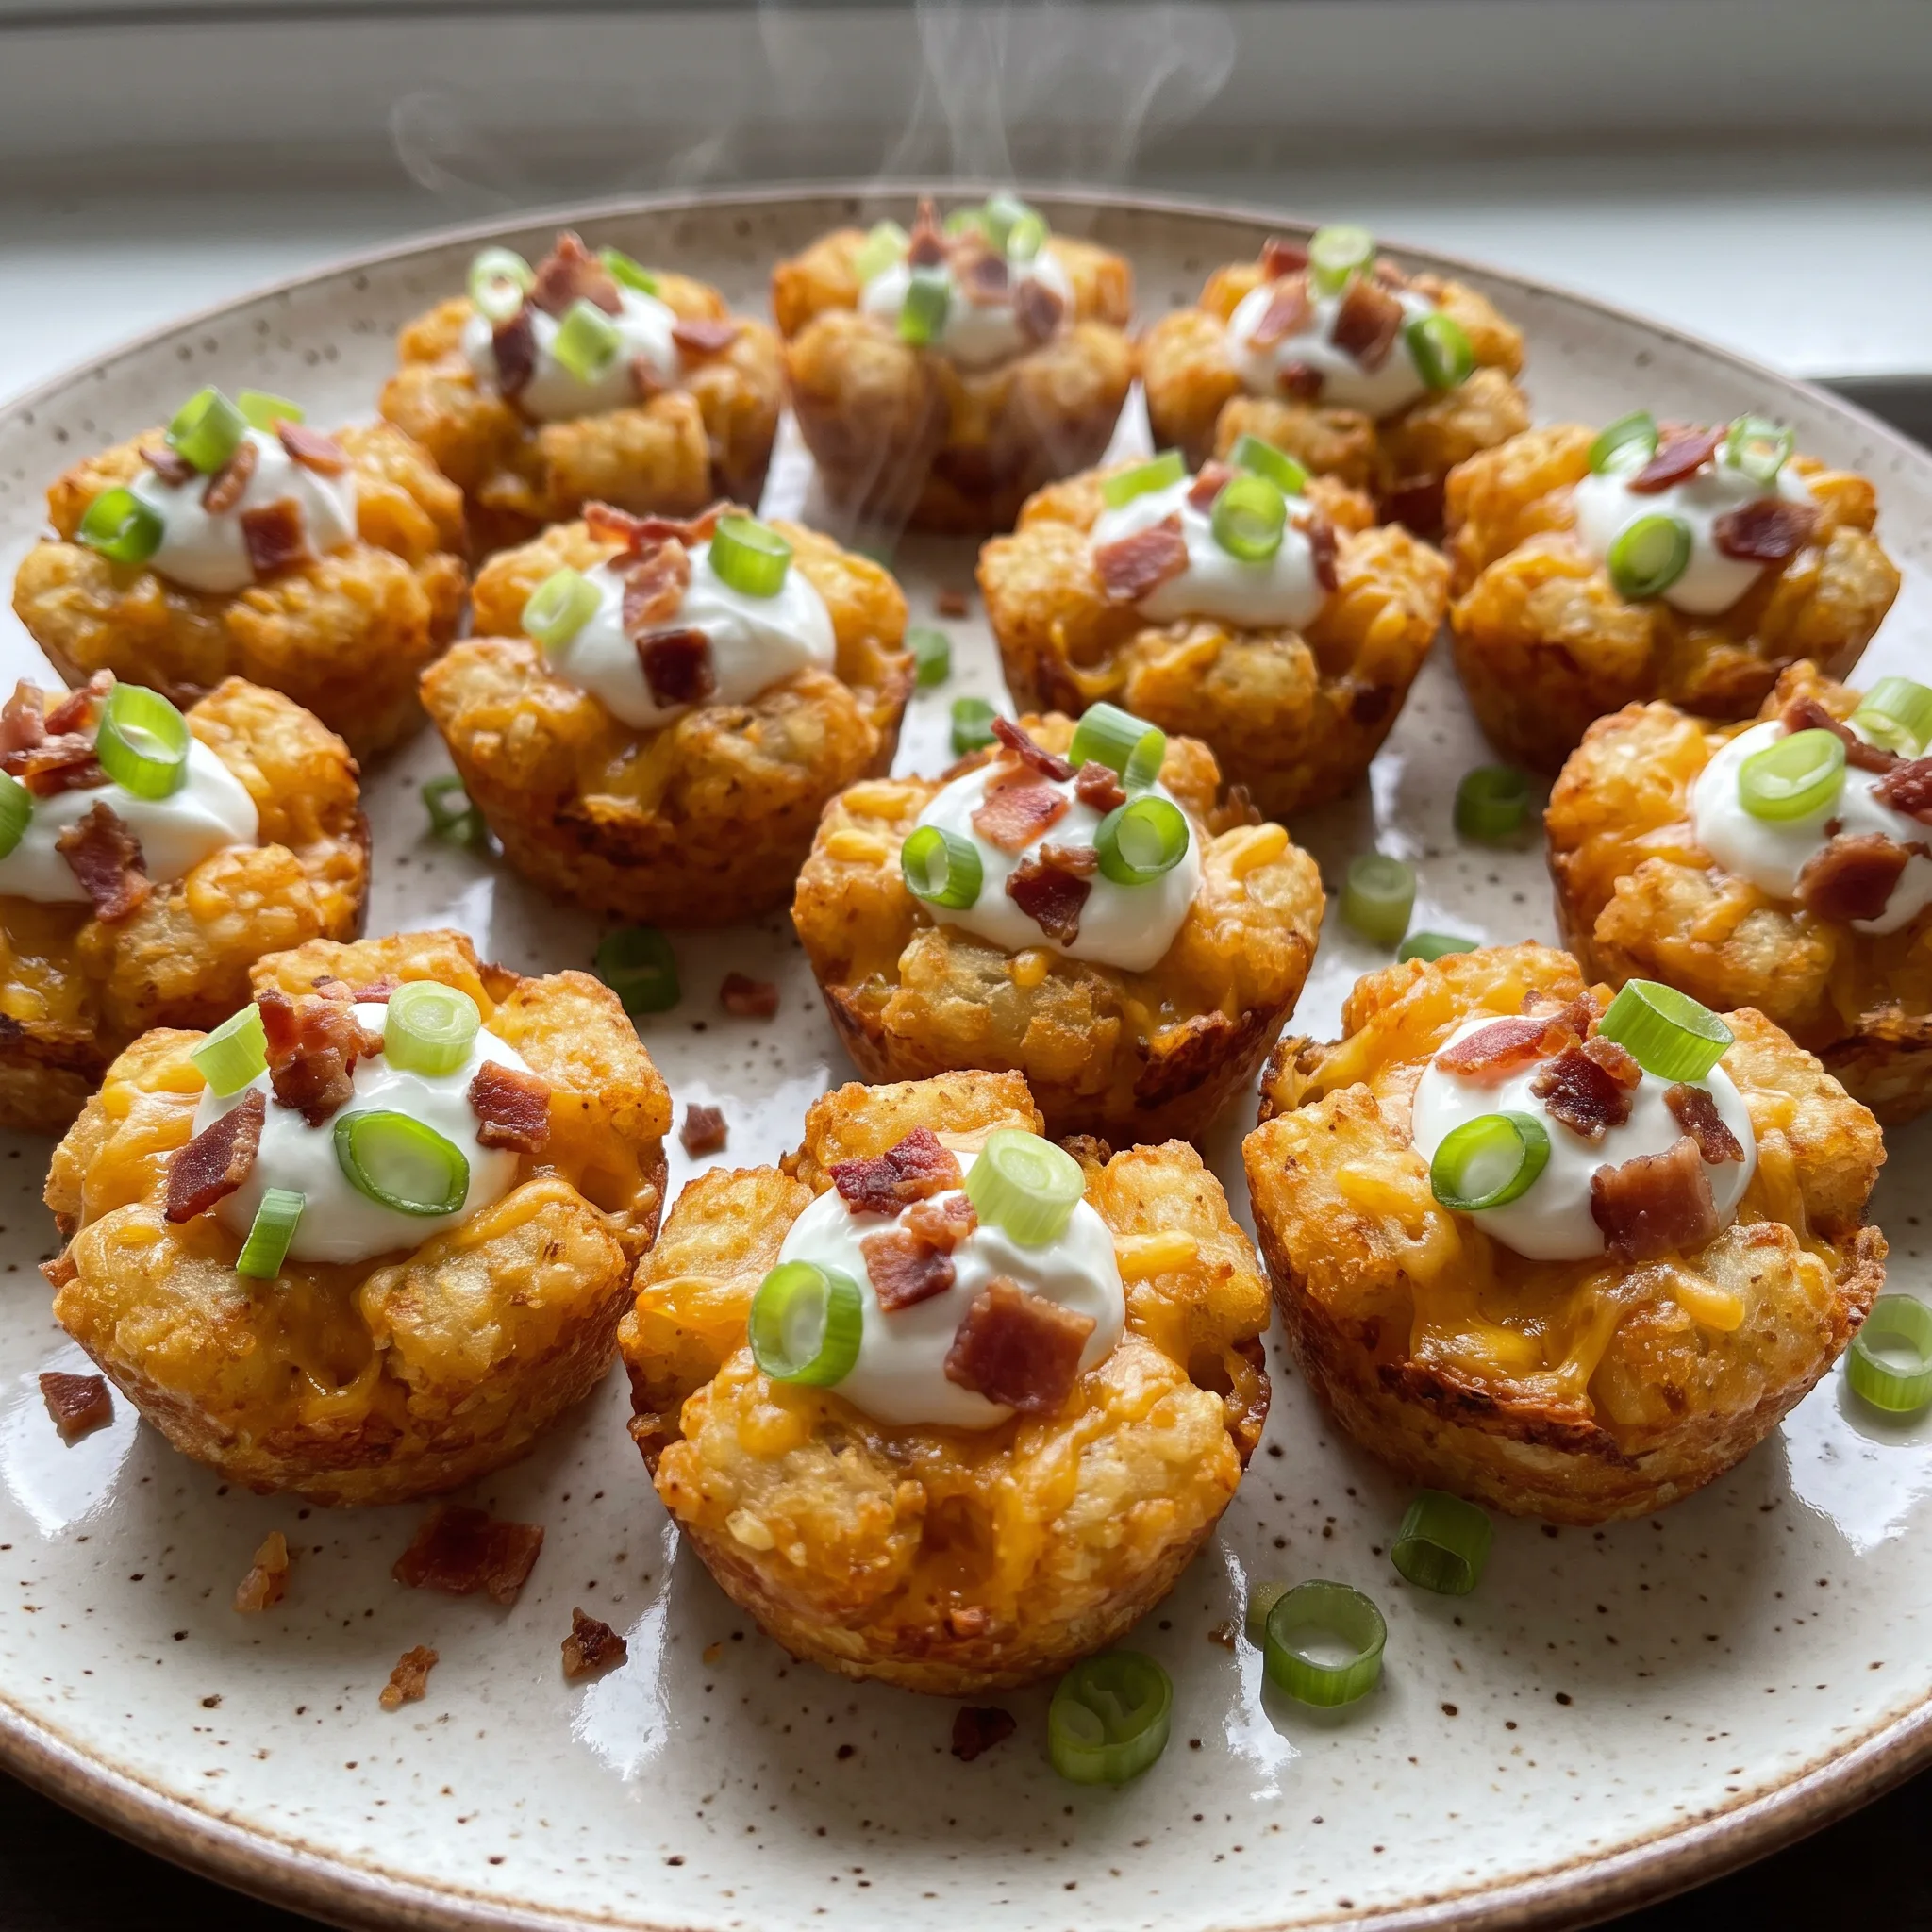
A sturdy potato shell, deeply browned and crisp at the rim, that cracks under your teeth before the cool sour cream and salty bacon hit. Building that shell from frozen tots takes a shot glass and some pressure, and the shaping window is narrow enough that pressing a beat too early shatters the potatoes instead of molding them.
Get it right and each loaded tater tot cup eats like a baked potato in one bite: gooey cheese sealed against the walls, cold toppings sitting on top, no sogginess underneath. That cheese layer does quiet work, blocking the sour cream from soaking in.
The whole thing hinges on texture and timing, and there’s a point during shaping where you can feel whether the cup will hold or slump.
Pick Your Pan, Then Count the Tots
The size of your muffin pan decides how many frozen tater tots go into each cup. For a mini muffin pan, 2 to 3 tots per cup works.
For a regular muffin pan, use 4 to 5. That count isn’t arbitrary. Too few tots and the cup comes out shallow, with thin walls that may collapse once you press them.
Too many and they overflow, so you can’t shape a proper cup. The number you start with also sets how much you can load later.
A deeper cup holds a full tablespoon of cheese plus sour cream, bacon, and green onions. A shallow one barely takes a sprinkle. So before you preheat anything, check your pan and count out the right number of tots.
That single decision shapes everything that follows.
How to Shape the Cups with a Shot Glass
After a short initial bake, the tots are soft enough to press but firm enough to hold. That’s your window. Coat the bottom of a shot glass or small juice glass with cooking spray so it doesn’t stick or tear the potatoes.
Keep a small gap between the glass and the edge of the muffin cup. Rotate the glass while pressing down, working around the cup.
That motion pushes the tots up the sides and forms a rim. Press too hard or too early and the tots break apart or refuse to hold a cup shape. Once you’ve got a defined cup, the structure is set.
You’ll feel the difference: the potatoes give slightly but don’t crumble. That’s when you know they’re ready for the next stage.
Why Cheese Goes In Before the Final Bake
Once the potato cups have their shape, a tablespoon of shredded cheddar goes into each one. Back into the oven just until it melts. That melted cheese does more than taste good.
It forms a barrier that keeps sour cream from soaking into the potato and making it soggy. It also acts as glue, holding the bacon and green onions in place. Freshly shredded cheddar melts smoothly because it doesn’t have the anti-caking agents that coat pre-shredded cheese.
Those agents can leave a grainy texture. The cheese layer adds richness and binds the cup. When you pull the pan out, the cheese should be fully melted and bubbling at the edges.
That’s your cue that the base is ready for the cold toppings.
The Right Moment for Cold Toppings
Sour cream, bacon, and green onions go on after the cups have cooled for 5 minutes. That short rest matters. If you dollop sour cream onto hot cups, it melts and turns runny, soaking the potato and ruining the contrast.
The bacon and green onions bring crunch and freshness that balance the warm, rich cheese and potato. Assemble them just before serving so the cups stay crisp.
You want each bite to have a bit of everything: the sturdy potato cup, the gooey cheese, the cool sour cream, the salty bacon, the sharp onion. Once topped, they’re best eaten right away, while the textures are still distinct.
The Ingredients That Make or Break the Cup
Frozen tater tots: Buy a 16-oz bag of plain tots, not seasoned or shaped, so they press into cups without falling apart.
Cheddar cheese: Shred 3/4 cup from a block, because pre-shredded cheese has anti-caking agents that leave a grainy texture when melted.
Bacon: Cook 4 slices until crisp and crumble them, since soft bacon turns chewy and won’t contrast the sour cream.
Green onions: Use only the green parts of 2 green onions, sliced thin, because the white parts are too pungent and wet for a topping.
The hard step is forming the cups by pressing partially baked tater tots with a shot glass. If the tots are pressed too early, they are still too soft and won’t hold a cup shape; if pressed with a dry glass, the potato surface sticks and tears, leaving weak walls. The recipe’s technique, coating the glass with cooking spray and rotating it with a small gap from the pan edge, applies even pressure without sticking, creating a defined rim that can support the cheese and toppings.
Judging the Cups While They Bake
Reading the Potatoes After the First Ten Minutes
Pull the pan at 10 minutes and look at the tots. They should have lost their frost, gone pale gold at the edges, and feel soft when you press one with the back of a spoon.
If they’re still cold in the center or rigid, they need another minute or two. Press too early and they shatter instead of molding. Too late and they’ve set into a crust that won’t move.
The window is narrow, so stay close.
Feeling When the Cup Walls Are Thick Enough
As you rotate the glass, you’re pushing potatoes up the sides. The wall should end up about as thick as your finger, with a clear hollow in the middle.
If you press too thin, the cup will slump or tear when you lift it out. If it’s too thick, you get a dense puck with no room for toppings.
Run your fingertip around the inside edge. It should feel like a sturdy bowl, not a fragile shell.
Spotting the Color That Means the Structure Is Set
The second bake runs 15 minutes, but the timer is a guide. What you’re watching for is deep golden brown across the exposed potato, with the rim looking crisp and dry. Pale spots mean the inside is still soft and will collapse under cheese.
If the edges darken too fast, tent the pan with foil. Once the cups are deeply browned, they’ll hold their shape when you fill them.
Knowing When the Cheese Has Fully Melted
After you add the cheddar, it needs 4 to 5 minutes. You’re looking for a smooth, glossy surface with bubbles at the edges. If it still looks matte or shredded, give it another minute.
Pull it too soon and the cheese won’t seal the cup, letting sour cream seep in later. Overbaked cheese turns greasy and tough.
The moment it’s bubbling and fluid, it’s done.
Loaded Tater Tot Cups with Cheddar and Bacon
Ingredients
Method
- Set oven to 450ºF. Mist muffin pan cups with cooking spray.
- For mini-sized muffin pan: Place 2-3 tots in each muffin cup. For regular sized muffin pan: Place 4-5 tots in each muffin cup.
- Position muffin pan on bottom rack of the oven and bake 10 minutes. Take the pan out of the oven.
- Coat bottom of shot glass or small juice glass with cooking spray. Keep a small gap between the glass and cupcake pan opening. Rotate the glass or container until the edges of the potatoes are close to the top of the muffin tin opening to form a potato cup. See video below for a demonstration. Put back in oven; bake additional 15 minutes or until deep golden brown.
- Put 1 tablespoon of cheese into each potato cup. Bake for 4-5 minutes, or until the cheese has melted. Move to platter and let cool for 5 minutes.
- Top and finish the loaded tater tot appetizer cups with sour cream, bacon, and green onions. Serve warm.
What to Swap, What to Leave Alone in Loaded Tater Tot Cups
Cheddar cheese: Monterey Jack or pepper Jack. Both melt about the same as cheddar, so the cheese still seals the cup and holds the toppings. Monterey Jack runs milder, letting the bacon and onion lead.
Pepper Jack brings heat that cuts through the sour cream. Shred either from a block, same as you would the cheddar.
Cheddar cheese: Pre-shredded cheddar. The anti-caking agents that keep those shreds loose in the bag leave a sandy texture once melted. You want a smooth, glossy surface that bubbles at the edges.
Buy a block and shred it yourself. The extra two minutes are worth it here.
Sour cream: Greek yogurt or crema. Both are thinner than sour cream, so they’ll slide off the warm cheese rather than sit in a cool dollop. Use the same 1/2 cup, but spoon it on at the last second and serve immediately.
Crema tastes tangier and looser; Greek yogurt brings more protein and a sharper edge. Neither will ruin the cup, but expect a wetter bite.
Bacon: Turkey bacon or bacon bits. Turkey bacon crisps up softer and less salty, so you lose some of the crunch that contrasts the sour cream. Cook it longer than pork bacon to get it as dry as possible, then crumble.
Bacon bits stay crunchy and save the frying step, but they taste more like seasoning than meat. Either way, use the same 4 slices or an equivalent handful of bits scattered over the tops.
Frozen tater tots: Do not swap. Their shape and starch are what make the cup work.
Shredded hash browns or diced potatoes won’t press into a sturdy shell and will crumble when you lift them out. Stick with plain tots, not seasoned or shaped, so they hold together after the first bake.
Storage and Serving: Keep the Cups Crisp
These cups are at their best warm, within about fifteen minutes of topping. Sour cream, bacon, and green onions go on right before serving, never in advance. That timing keeps the sour cream cool and the bacon crunchy; wait and the dairy melts into the cheese and the potatoes soften.
If you want to work ahead, bake the cheese-filled cups up to two days before. Cool them completely, then store in an airtight container in the fridge. To reheat, put them on a sheet pan in a 400ºF oven for 5 to 7 minutes, until hot and crisp again.
The microwave works in a pinch but leaves the potatoes limp.
Don’t freeze assembled cups. The cheese and potato turn grainy when thawed. The unfilled baked cups freeze well for up to a month; reheat straight from frozen at 400ºF for 10 to 12 minutes.
Leftover topped cups hold in the fridge for a day, but the toppings will have soaked in. Scoop off the cold toppings and reheat the cups, then add fresh sour cream, bacon, and onions.
Tips
- Count out 48 to 60 tots before you start. The 16-oz bag holds roughly that many, but tots vary by brand, and a bag that runs short or a batch of oversized tots means some cups get 2 while others get 5, so the cups bake unevenly and the shallow ones collapse when you press them.
- If your count lands below 48, add a few extra tots to the cups that look thinnest rather than spreading them evenly. A cup with 2 oversized tots presses into a wall too thin to hold a tablespoon of cheese, and that one cup will be the one that tears when you lift it out.

Frequently Asked Questions
Can I make these loaded tater tot cups ahead of time?
Yes, but only partially. Bake the cheese-filled cups up to two days ahead, cool them completely, and store airtight in the fridge. Reheat on a sheet pan at 400°F for 5 to 7 minutes until hot and crisp.
Add sour cream, bacon, and green onions right before serving so the toppings stay fresh and the cups stay crisp. Freezing assembled cups is not recommended because the cheese and potato turn grainy when thawed, but unfilled baked cups freeze well for up to a month and reheat from frozen at 400°F for 10 to 12 minutes.
Why did my tater tot cups fall apart?
The most likely cause is pressing the tots before they’ve softened enough. After the first 10-minute bake, they should feel soft when you press one with the back of a spoon and look pale gold at the edges.
If they’re still cold or rigid, they’ll shatter instead of molding. Another common issue is pressing the walls too thin. You want them about as thick as your finger, with a clear hollow; too thin and the cup slumps when you lift it out.
Finally, underbaking the second time leaves the inside soft. The cups need to be deep golden brown and crisp before you fill them.
How are these different from regular loaded tater tots?
Regular loaded tater tots are usually baked as individual tots and then topped, so the toppings sit on a flat surface and slide off. Here, you press the tots into a muffin pan to form a cup, which creates a hollow that holds a tablespoon of cheese, sour cream, bacon, and green onions.
That means each bite delivers a bit of everything: the sturdy potato cup, gooey cheese, cool sour cream, salty bacon, and sharp onion. The cup also keeps the sour cream from soaking into the potato too quickly, so the texture contrast lasts.
