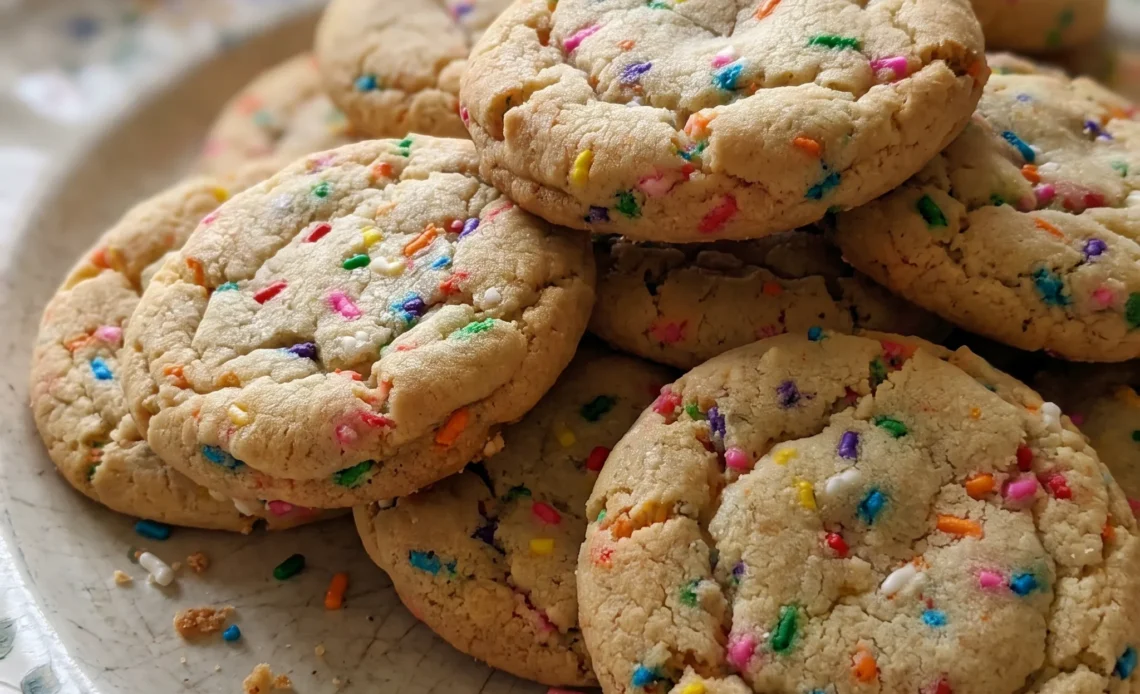
Funfetti sugar cookies skip the chilling step that most sprinkle cookies demand, and that single decision shapes everything about how they bake. Cold dough spreads on its own schedule; room-temperature dough goes into the oven at the same temperature every batch, so the tray behaves predictably.
The trade-off is timing: wait too long and the sprinkles bleed color into the dough. Jimmies hold their shape.
Nonpareils don’t. The margin for error sits mostly in your butter, which needs to be soft enough to cream but cool enough to trap air, and in the flour, which shifts depending on what you tossed in. Get those right and you land on a cookie with a crackled sugar shell and a chewy middle.
Miss them and you get flat, pale disks.
The sprinkles are the variable that changes the dough’s hydration: their moisture content and fat-based coating determine how much free liquid the flour must absorb. When dough sits, water migrates into the sprinkles, dissolving their dyes and causing color bleed while also changing the dough’s consistency. This shifts spread during baking, because a wetter dough flows more before the structure sets.
Do different sprinkles change how much flour you need?
Sprinkles aren’t just for looks. The kind you choose changes how much liquid the dough pulls from them. Jimmies are the classic rod-shaped sprinkles, and they have a thin fat coating that keeps them from soaking up moisture.
Nonpareils, those tiny balls, have no coating and will dissolve, releasing their color and moisture into the dough. Sanding sugar is coarse and dry, so it adds crunch without much moisture.
Because of these differences, the flour amount must be adjusted. The recipe notes give a specific range for the sprinkles used here. If you use a wetter sprinkle like nonpareils, you’ll need more flour to keep the dough from spreading too much in the oven.
With drier sprinkles, less flour keeps the cookies tender instead of dry and crumbly. So before you scoop, check the notes for the right flour quantity based on your sprinkles. That small adjustment makes the difference between cookies that hold their shape and ones that turn into flat puddles.
Why roll cookie dough balls in sugar before baking?
That outer coating of granulated sugar does more than add sparkle. As the cookies bake, the sugar on the surface doesn’t dissolve into the dough.
It stays gritty, creating a thin, crackly shell that shatters slightly when you bite in. Underneath, the interior stays soft and chewy because the sugar inside the dough has melted and sweetened it.
The coating also helps the cookies keep their shape. It creates a slight barrier that slows down spread, so the edges set before the center can flatten too much. You get a crackled top and a chewier middle.
Coat each dough ball evenly right before it goes into the oven. If you coat them ahead and let them sit, the sugar can start to draw out moisture and get sticky.
Roll them, coat them, and bake them straightaway. The result is a cookie with a delicate crunch outside and a tender crumb inside.
Can you leave cookie dough out at room temperature?
You don’t need to chill this dough. In fact, keeping it at room temperature and scooping just before baking gives you the most even results. When dough sits out, the sprinkles can start to bleed their color into the surrounding dough.
Jimmies are coated, so they hold up better, but nonpareils will bleed quickly, turning your dough a muddy pastel. That doesn’t affect taste, but it’s not the look you want. Room-temperature dough also spreads at a predictable rate.
Cold dough spreads less and can bake up thicker and paler. By scooping just before baking, each cookie goes into the oven at the same temperature, so they all spread and bake the same way.
Keep the dough in the bowl and scoop only what you need for each batch. Any extra dough can wait, but don’t let it sit out for hours.
A short rest is fine. This approach gives you consistent cookies with clean sprinkle colors.
Why do these cookies look underbaked when you take them out?
Pull them from the oven when they’re puffy and the edges are just set. The centers will look shiny and slightly wet, and that’s exactly right. The heat of the baking sheet continues to cook them after they leave the oven.
That carryover baking sets the middle without drying it out. As they cool, the cookies deflate and flatten, developing a chewy texture. If you wait until they look fully baked in the oven, they’ll end up crisp and hard.
Let them cool on the pan for 10 minutes. During that time, they finish setting and become sturdy enough to move. Then transfer them to a wire rack to cool completely.
This two-stage cooling is what gives you that soft, chewy center. The cookies will keep that texture for days if stored properly. So don’t second-guess the underbaked look.
It’s the sign of a baked sugar cookie.
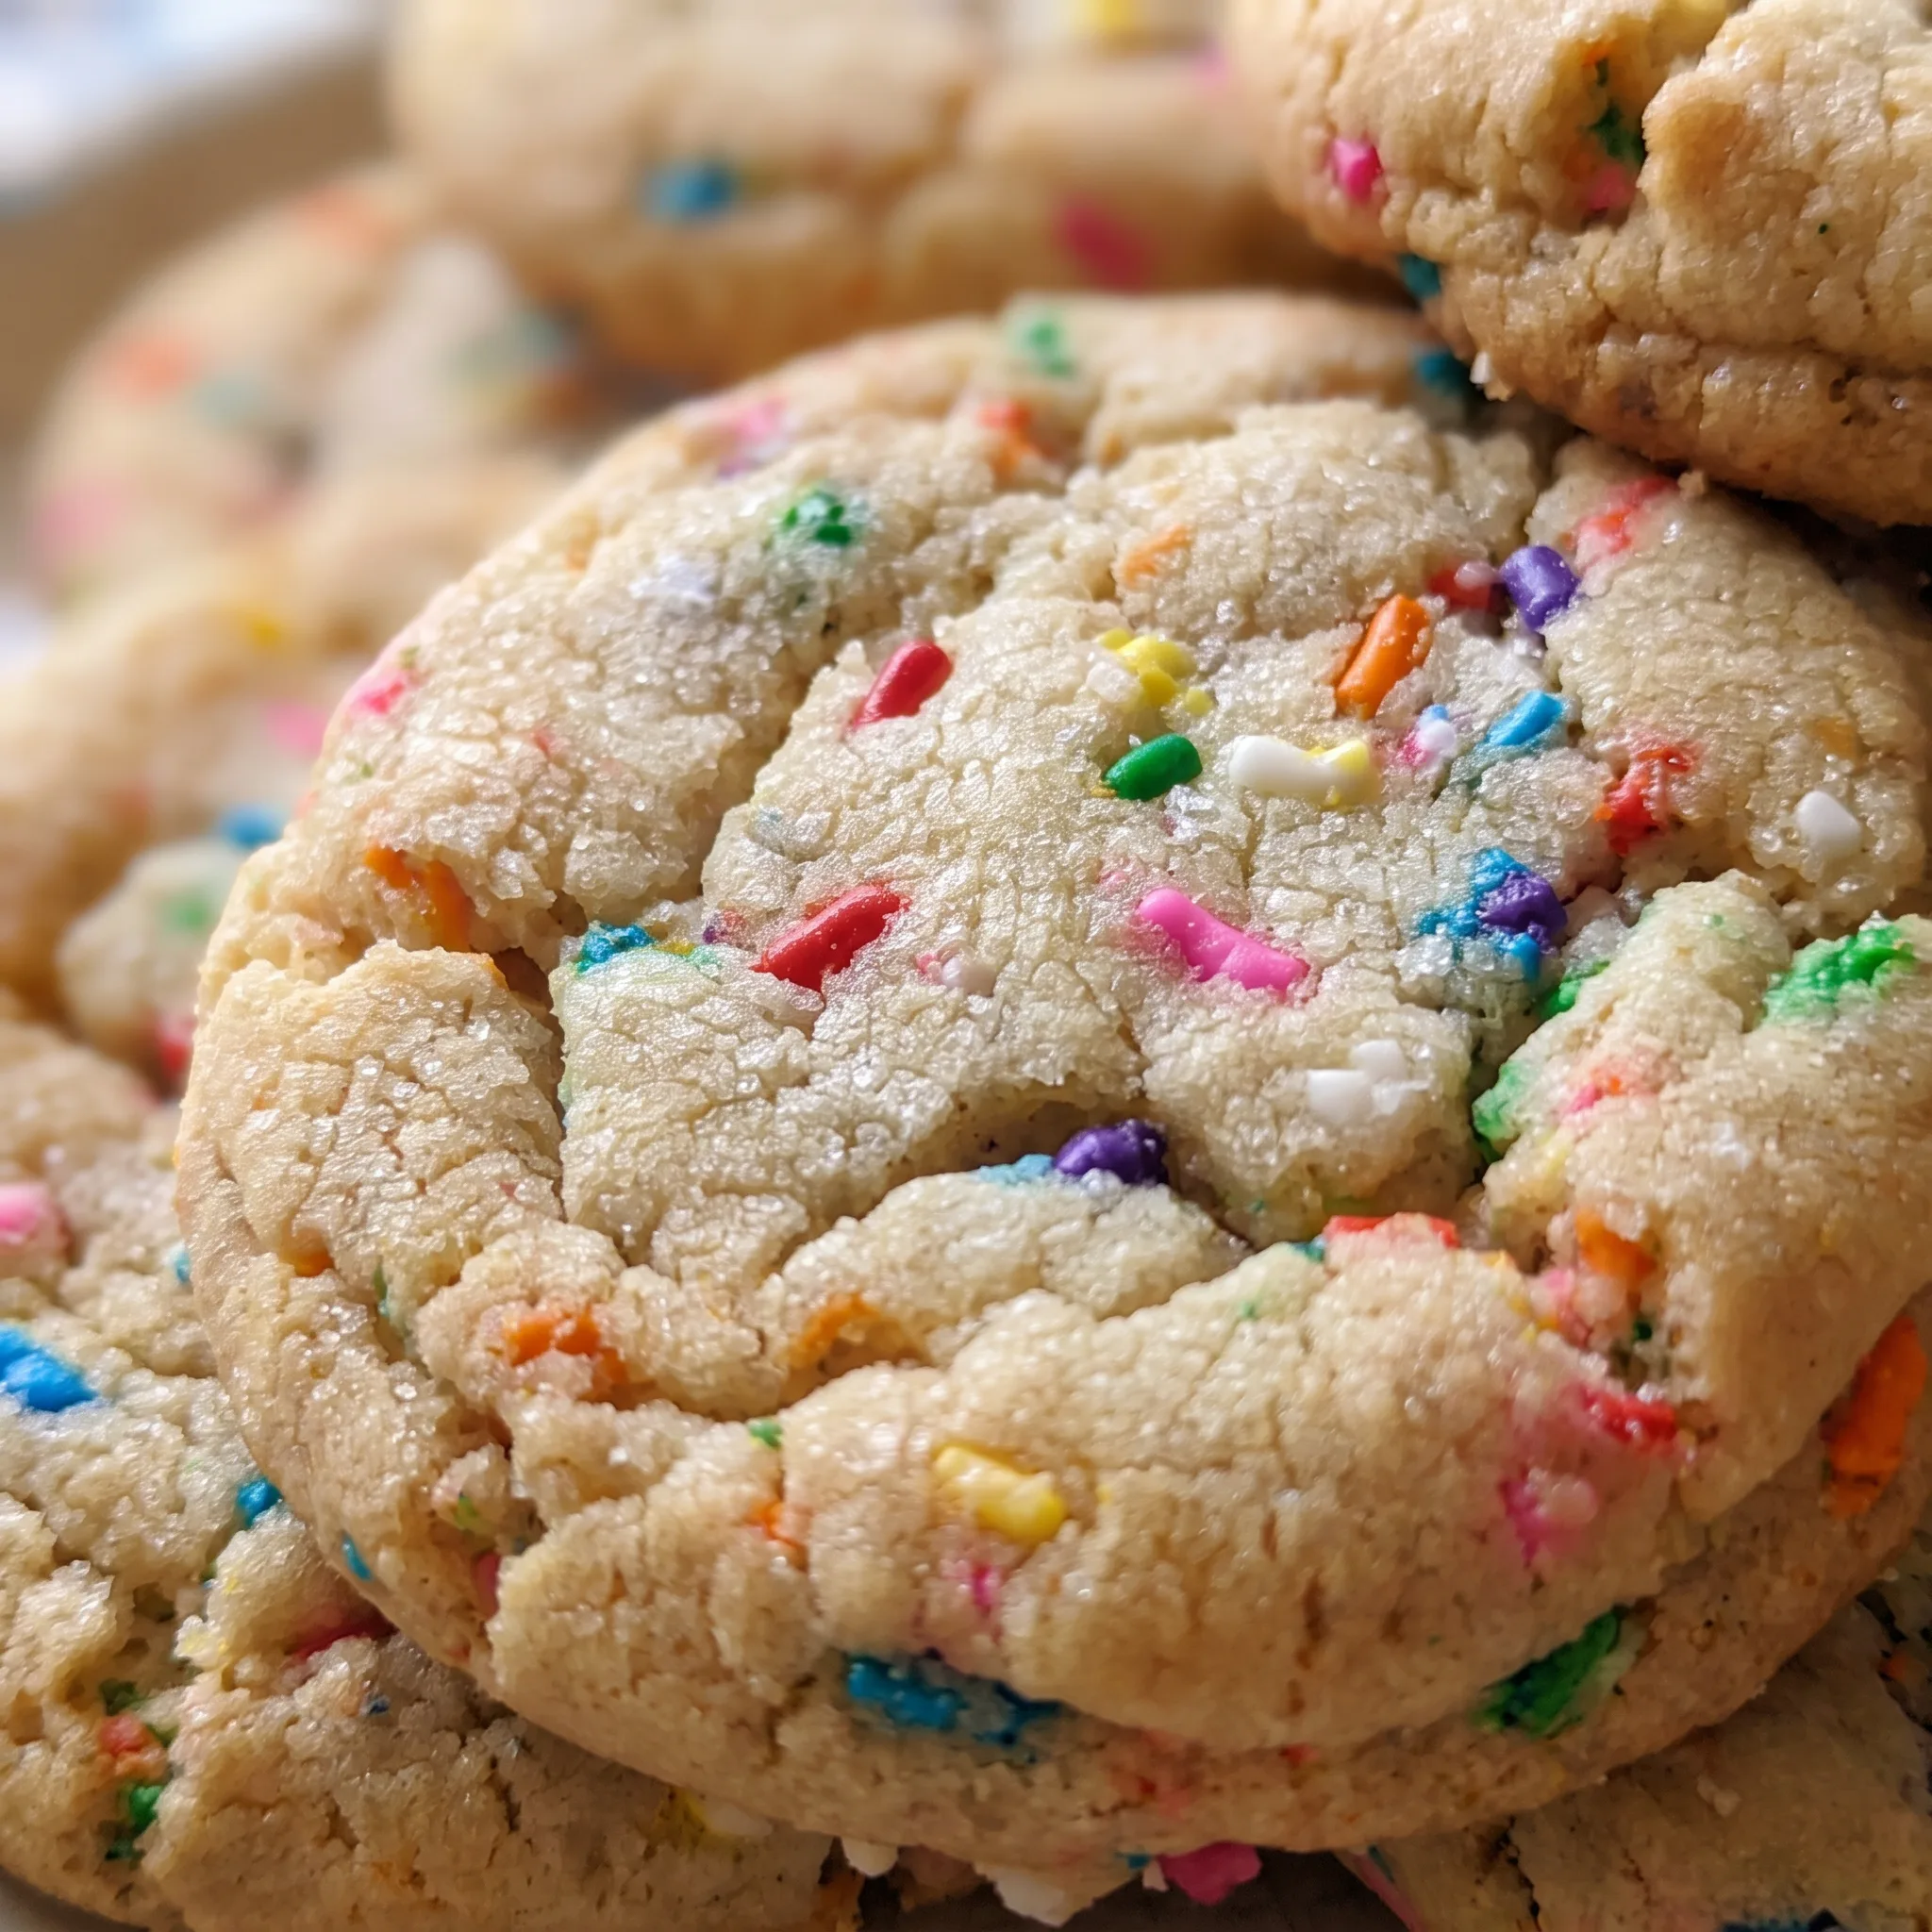
What matters about the butter, the sprinkles, and the vanilla in this dough
Unsalted butter: It should be soft enough to dent with a finger but still cool to the touch, since butter that’s greasy or melting won’t hold air when you beat it.
Sprinkles: Jimmies are coated and hold their shape and color in the dough, while nonpareils dissolve and bleed, so what you buy decides how the flour measures out.
Vanilla bean paste: Paste carries the little seed specks and a deeper flavor than extract, and either one works, so use what’s in the cupboard.
Egg: A cold egg straight from the fridge can seize the beaten butter and sugar, so it should sit out until it’s no longer chilly.
All-purpose flour: Weigh it at 295 g rather than scooping from the bag, since a packed cup adds enough extra flour to make these cookies dry and stiff.
Granulated sugar for coating: Coarse sugar crystals stay intact on the surface instead of dissolving, which is what gives the crackled shell, so don’t reach for powdered or brown.
Reading the dough and the cookies at the moments that decide how they turn out
Judging the butter and sugar by feel, not by the clock
Beat on high until the mixture looks paler and has visibly gained volume, and you can feel the grit of sugar mostly gone when you rub a bit to the touch. Still grainy means the sugar hasn’t dissolved enough to carry air, and the cookies bake up flatter and denser.
Stop when it’s smooth and light. If it looks greasy or slick at the bottom of the bowl, the butter was too warm and the emulsion is breaking; nothing later fixes that, so start with cooler butter.
Knowing when the dough has taken enough flour
The dough should pull away from the bowl in a soft, slightly tacky mass that holds its shape when you scoop it. If it looks wet or slack, the sprinkles are releasing moisture and the flour is short.
If it crumbles or feels stiff, you’ve gone too far. Judge by feel, not by the mixer’s sound.
This is where the flour adjustment for your sprinkle type shows up. A dough that’s too soft spreads; too stiff bakes up dry and pale.
Reading the first batch to set your scoop spacing
The card says start with 6 per sheet, then move to 8 once you’ve seen their spread. That first tray is your measurement, not just a batch.
Watch how far the edges travel while they bake. If they’re touching, keep 6.
If there’s clear space between them, 8 fits. A 2 Tbsp scoop of this dough spreads more than you’d guess, and crowding means uneven edges and torn cookies when you separate them.
The point where they should come out of the oven
Pull them at 11 to 12 minutes when they’re puffy and the edges are just set. Centers will look underdone and shiny. That’s the sign, not a problem.
Leave them in until the tops look dry and you’ve baked past the chewy stage and into crisp. Let them sit on the pan 10 minutes; they flatten and finish setting there.
Move them too early and they tear; move them too late and they stick.
Recognizing when the dough has waited too long
Room-temperature dough scoops and bakes predictably, but time in the bowl lets the sprinkles bleed. Watch for color staining the dough around the sprinkles, or a wet sheen on the surface. Jimmies hold up longer than nonpareils.
Once the bleed is obvious, the color won’t come back, and the dough is also wetter and will spread more. Scoop just before baking each batch to avoid it.

Funfetti Sugar Cookies with Sprinkles
Ingredients
Method
- Set oven to 350°F (175°C). Prepare 2–3 baking sheets by lining them with parchment paper; depending on your oven’s capacity, you might need to bake in multiple batches.
- Using a stand mixer with the paddle attachment, beat the butter and sugar on high speed until the mixture becomes light and fluffy. Incorporate the egg and vanilla, mixing until combined. In a separate small bowl, whisk together the flour, baking soda, and salt. Add this dry blend to the mixer, then add the sprinkles, and mix on low speed until just incorporated.
- With a 2 Tbsp cookie scoop, drop portions of dough onto the lined baking sheets. Begin with 6 per sheet to verify they won’t touch, then increase to 8 per sheet once you’ve determined their spread.
- Shape each dough portion into a ball by rolling between your palms, then coat in the sugar before setting on the baking sheet. Keep any dough you aren’t baking right away in the bowl and scoop just before baking.
- Bake the cookies for 11–12 minutes, until they are puffy and the edges are set. Take them out of the oven and let them cool on the pan for 10 minutes; they will flatten as they cool. Move to a wire rack and let them cool completely. Continue the baking process with the remaining dough.
Notes
Storing and serving funfetti sugar cookies
Eat these the day they’re baked. The contrast is the whole draw: a thin crackly sugar shell over a soft, chewy center, and that outside texture fades fastest.
Once the cookies cool completely, move them to an airtight container at room temperature. A plate under plastic or a loose bag won’t do it; the dry air pulls moisture from the crumb and the surface sugar starts drawing it back, so the coating turns damp and slightly sticky within a day.
Sealed properly, they hold for a few days, softening as they sit. The sugar coating loses its snap first, then the crumb firms. That shift isn’t a flaw, just a different cookie, and it’s the reason day one is the serving window worth aiming for.
Don’t refrigerate them; cold dries out the crumb and the sugar coating goes tacky. If you want the outside crisp again, a few minutes in a 300°F oven revives it, but the center stays softer than fresh. Freezing works for the scooped dough balls, not the baked cookies.
Roll, coat in sugar, freeze solid on a sheet, then bag. Bake from frozen, adding a minute or two, and coat in fresh sugar before they go in.
Tips
- Use a 2-tablespoon scoop and level it against the bowl edge so each ball is the same size. Uneven portions bake at different rates, and a heaped scoop spreads wide enough to touch its neighbor before the 11-minute mark.
- Bake the first tray of 6 with nothing else on the sheet, then look at the spacing before you load the rest. If the edges are within an inch of each other when they come out, keep 6 per sheet; if there is a clear gap, 8 fits. The dough spreads more than the scoop size suggests, and crowding tears edges when you separate cooled cookies.
What you can change in this dough, and the two things you can’t
Unsalted butter: Plant-based stick butter, the kind that comes in measured sticks and lists a fat percentage near 80, not the soft tub spread. Start with the same 1 cup (225 g) the recipe calls for. Stick butter creams and holds air about like dairy butter, so the dough looks and scoops the same.
Tub spread has more water and less fat, and it will never gain volume when you beat it; the cookies come out greasy at the edges and flat in the middle. Taste is close enough that the vanilla and sprinkles cover it.
If the brand you buy feels softer than dairy butter at room temperature, chill it a few minutes before you start.
Egg: One flax egg: 1 tablespoon ground flaxseed stirred into 3 tablespoons water, left 5 to 10 minutes until it thickens to a gel. Use it in place of the single large egg.
The egg here is the only real liquid binding the dough, so the swap shows up in the crumb. Flax gives you a slightly denser, softer cookie that spreads a touch more and browns a little faster, so watch the first tray at 11 minutes. There’s a faint nutty taste that reads as part of the vanilla.
Aquafaba, 3 tablespoons, behaves closer to a real egg in this dough if the flax flavor bothers you.
Vanilla bean paste: An equal measure of vanilla extract, or the seeds scraped from half a vanilla bean plus a splash of extract. Extract brings the same flavor without the visible specks, so the cookies look plainer.
Nothing about the dough’s texture changes. If you want the flecked look, scrape the bean and stir the seeds in with the extract; the paste is mostly there for those specks and a slightly rounder taste.
All-purpose flour and sprinkles: Leave both alone. Weigh the flour at 295 g, and buy jimmies rather than nonpareils unless you’re following the flour range in the notes. These two are tied together.
Nonpareils dissolve and release moisture into the dough, which means more flour; jimmies stay intact, which means less. Change one without matching the other and you get either puddles or dry, pale cookies. Gluten-free blends won’t behave here either, since they typically need more liquid and a rest before baking, and this dough is mixed and scooped straightaway.
If you do go gluten-free, expect a crumblier cookie and don’t add liquid to compensate.

Frequently Asked Questions
Can I make the dough ahead of time and bake later?
You can, but the sprinkles will bleed their color into the dough the longer it sits. Jimmies hold up better than nonpareils, so if you’re making the dough ahead, stick with jimmies to keep the colors clean. The dough also firms up in the fridge, so you’ll need to let it soften slightly before scooping.
For the best results, scoop and coat the dough balls in sugar just before baking, since the coating can get sticky if it sits. The article’s storage section explains why day-one cookies are the goal, but making the dough a few hours ahead is fine if you keep it covered.
Why did my funfetti cookies turn out flat and spread too much?
The most likely culprit is butter that was too warm or greasy when you creamed it, so it couldn’t hold air and the dough slackened. Start with butter that’s soft enough to dent but still cool, and stop beating when the mixture looks pale and fluffy, not slick.
Another cause is using nonpareils without adjusting the flour, since they release moisture and make the dough wetter. Check the notes for the right flour amount if you didn’t use jimmies. Also, if you skipped coating the dough balls in sugar, the surface lacks that barrier that slows spread.
How are funfetti sugar cookies different from regular sugar cookies?
The sprinkles are the obvious difference, but they also change the dough’s behavior. Jimmies are coated and stay intact, while nonpareils dissolve and add moisture, so the flour amount has to be adjusted accordingly.
That means you can’t just swap in sprinkles without checking the notes for the right flour quantity. The sugar coating on the outside is the same as many sugar cookies, but here it’s essential for that crackly shell and to help the cookies keep their shape.
Texture-wise, these are soft and chewy with a slight crunch from the coating, while regular sugar cookies might be crisper or have a different finish.
