
Overshooting the temperature is the mistake that ruins more hams than anything else in the kitchen. Somewhere along the way, cooks got sold on a hot, fast oven, thinking a blast of heat is what puts a crust on a baked bone in ham.
It isn’t. That approach browns the outside before the center ever warms through, and by the time the middle catches up, the outer inch has gone tight and dry. The long, low roast is slower than you’d expect, and it’s the reason the meat under the glaze stays soft enough to cut with a fork.
Get the timing wrong and you’ll know it at the board, not the oven. Watch the glaze blister and smell it turning nutty, and you’re close. The trick is knowing when to pull it, and that part is easier than it looks once you know what to watch.
Why Bone-In Matters for a Long Roast
A bone-in ham does more than look impressive. That bone is a heat sink, pulling warmth away from the center so the meat around it warms gradually. Without it, the lean portions would cook faster and dry out.
The bone and connective tissues also release moisture as they heat, basting the ham from the inside. This internal basting keeps the meat juicy during the two hours in the oven. The bone slows the temperature rise just enough that the glaze has time to caramelize without burning.
Have you ever noticed how a bone-in roast stays moist even when you push the cook time? That’s the bone at work. When you pull the ham out, the meat near the bone will be slightly pinker and more tender.
That’s exactly what you want.
Scoring Creates Flavor Pockets
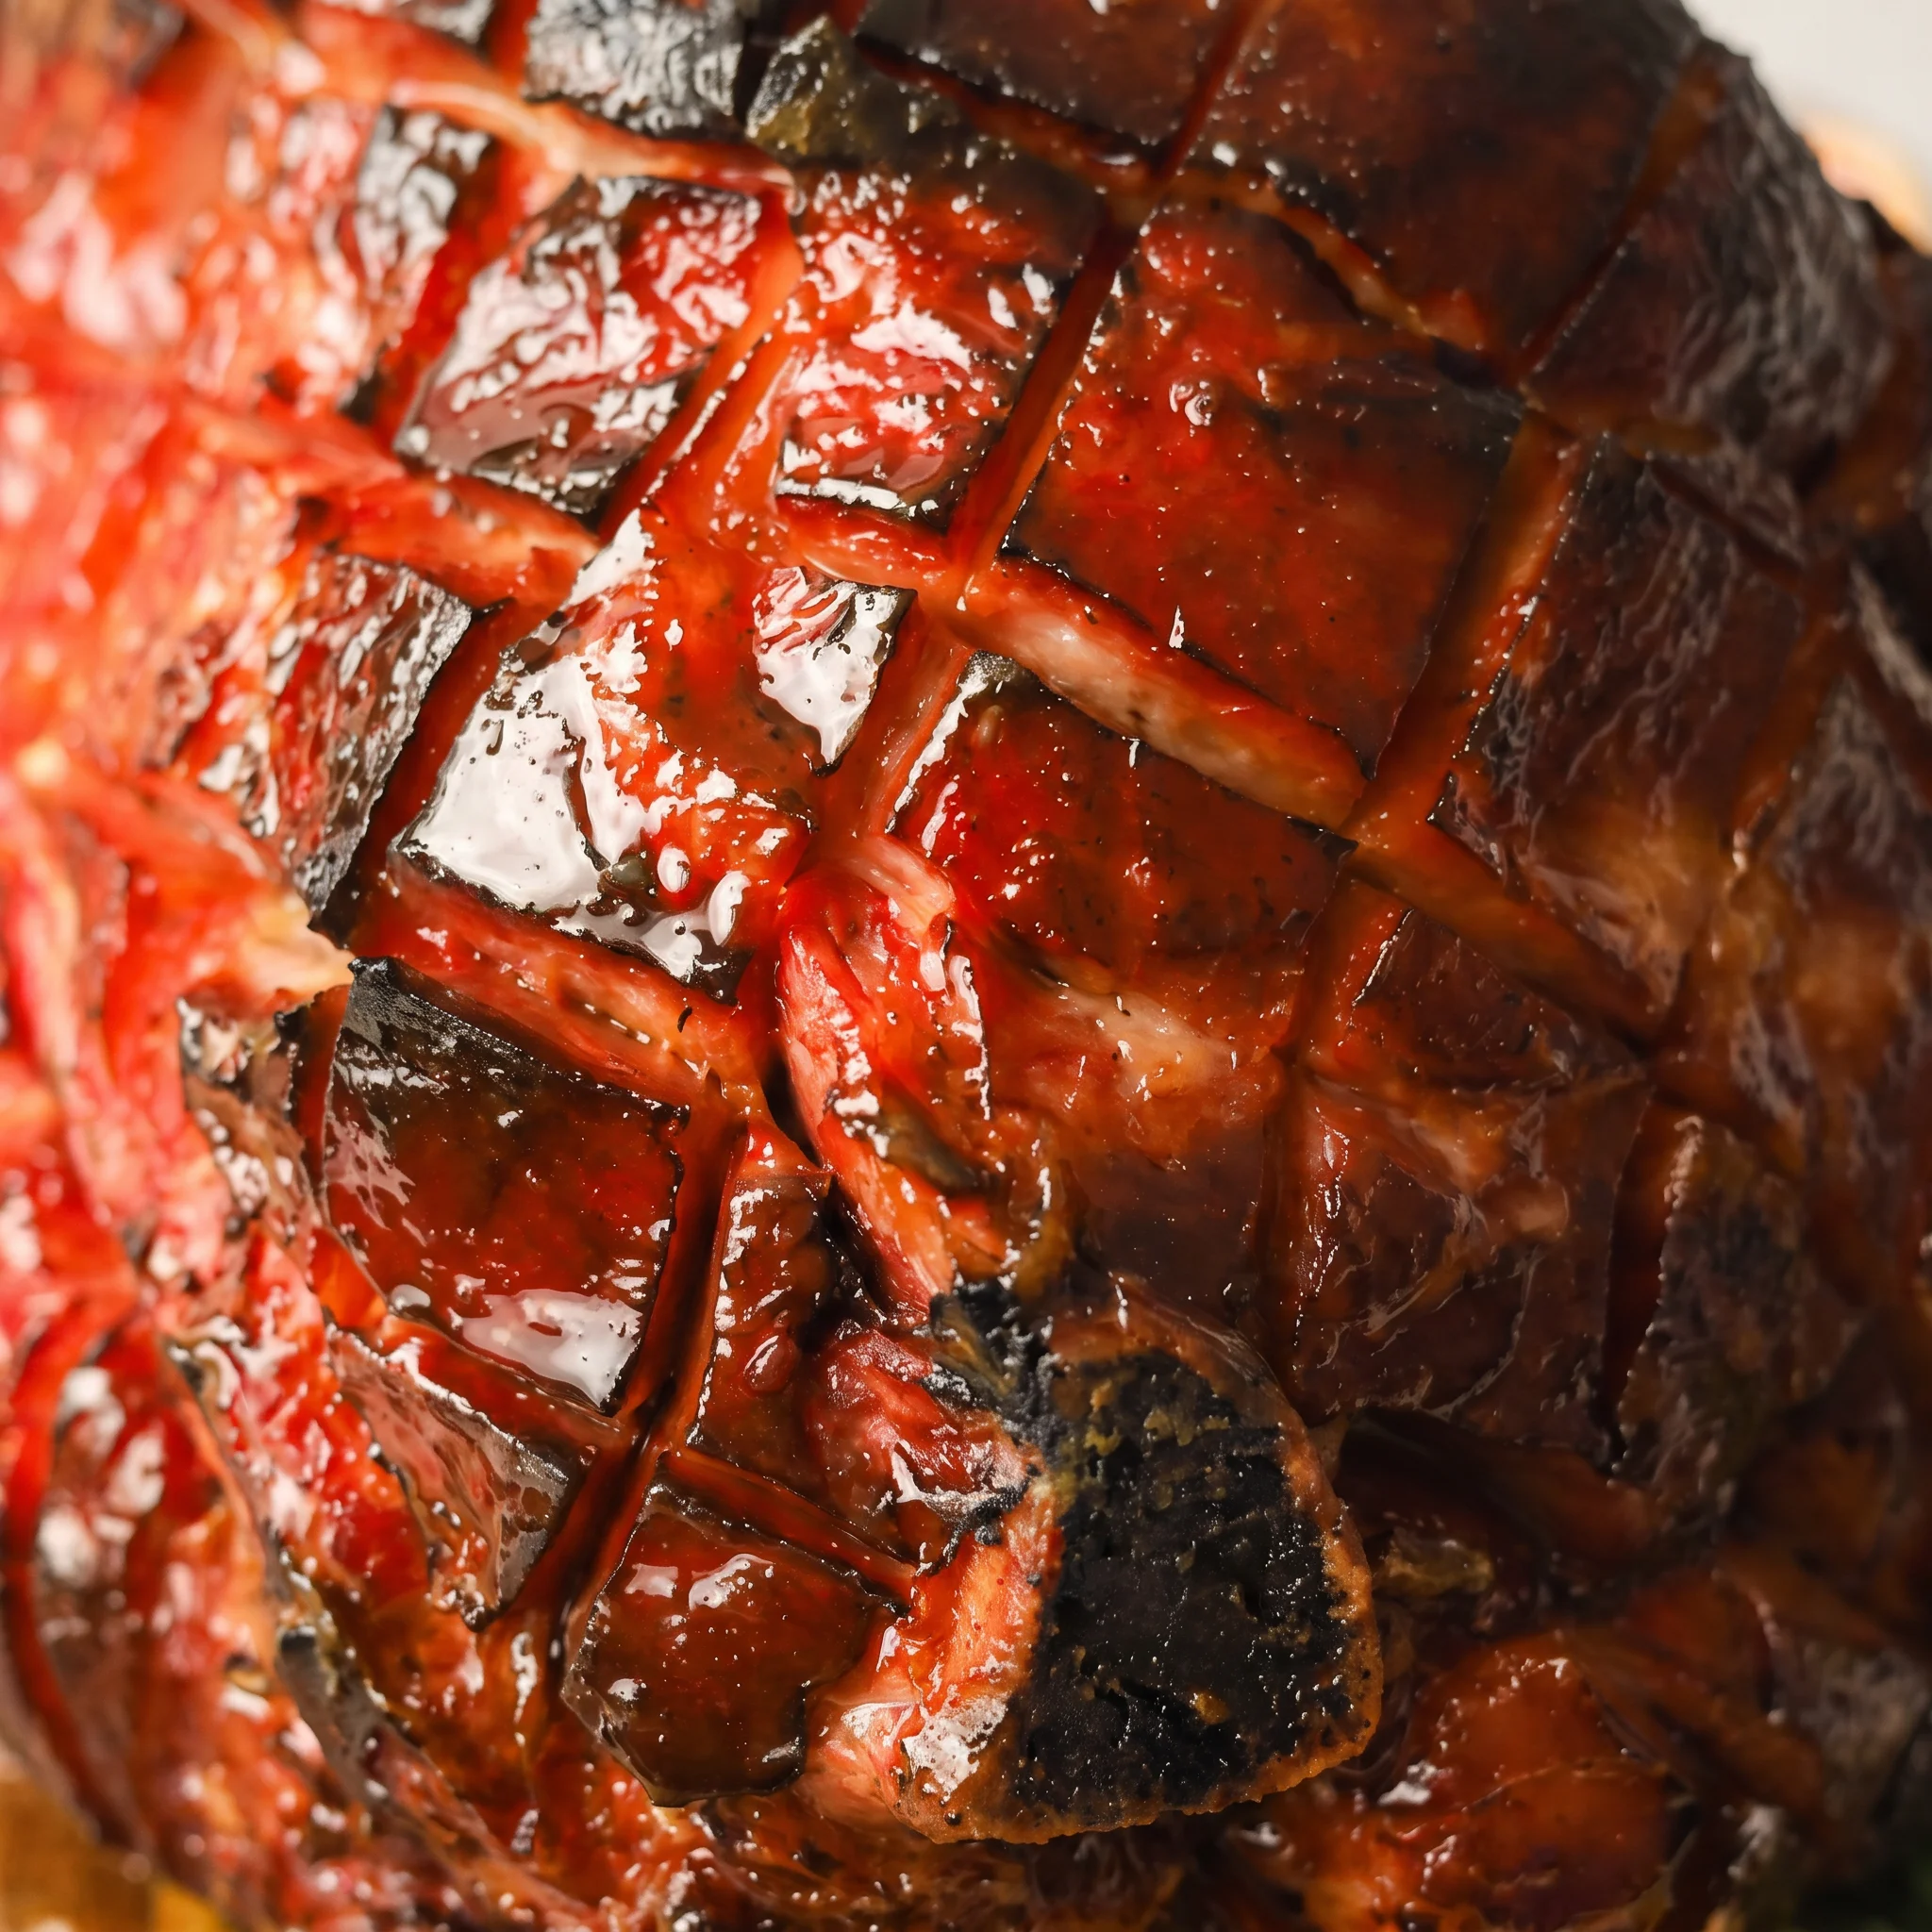
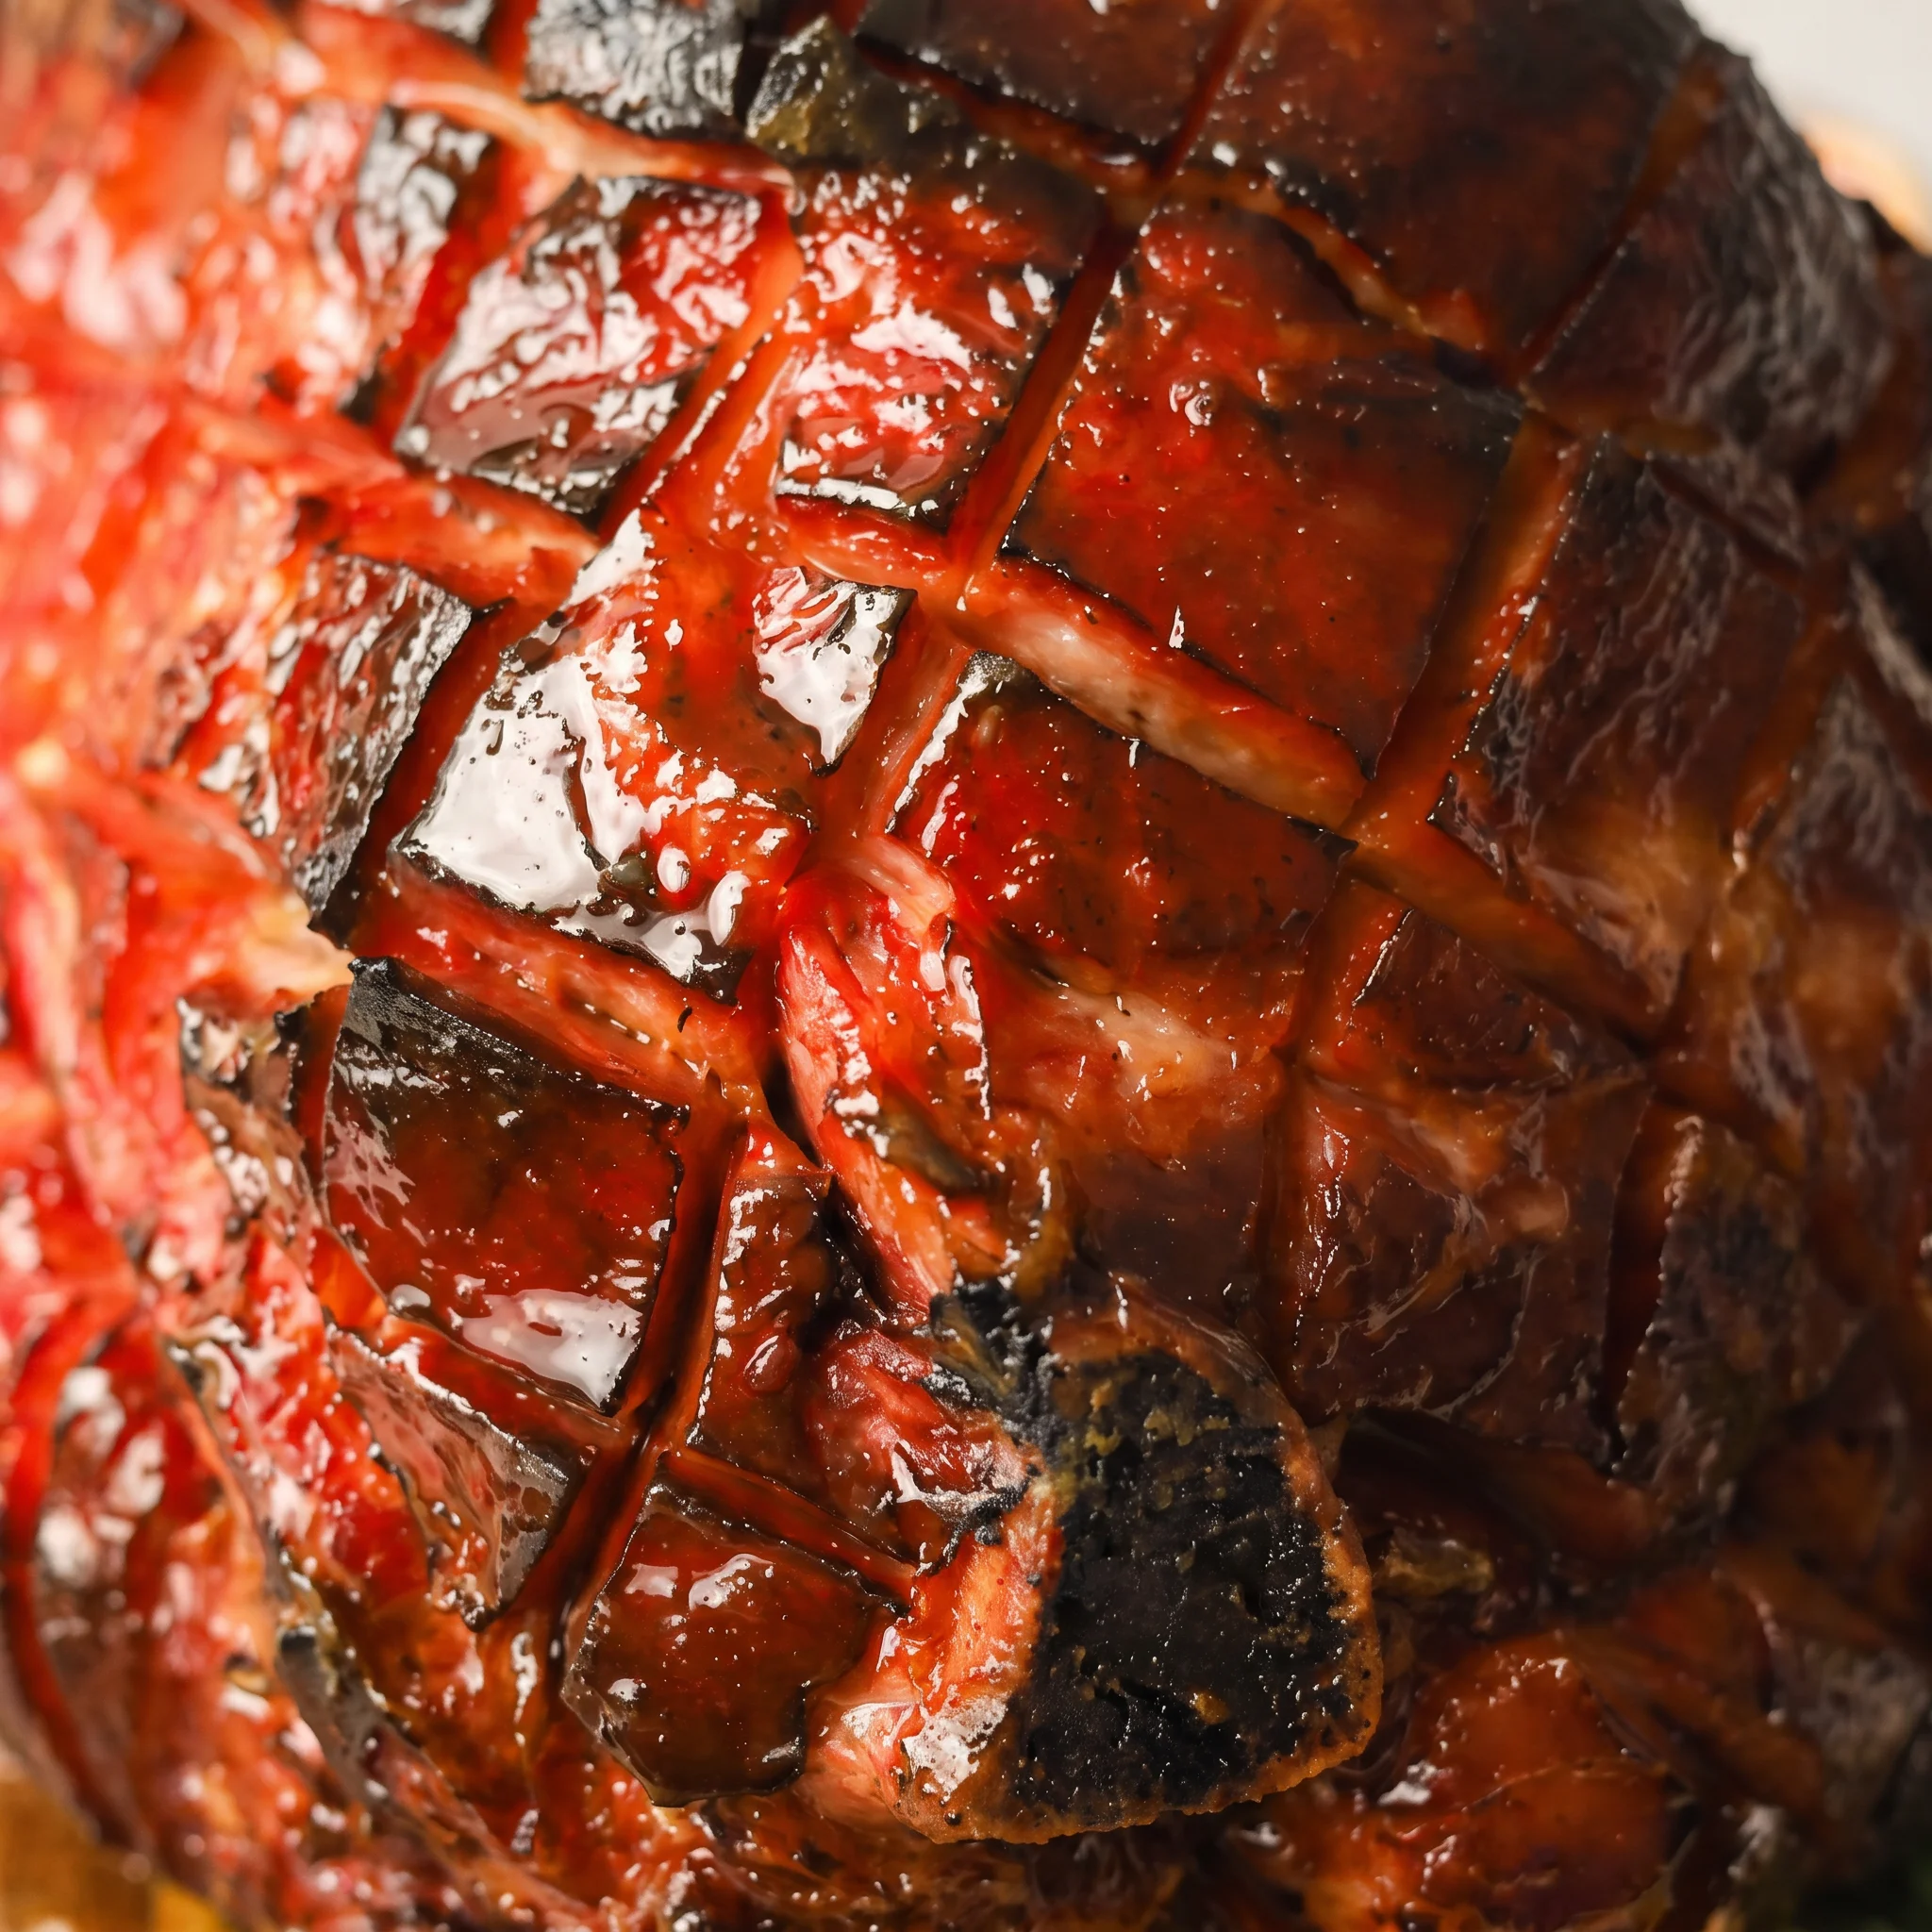
Those diamond cuts aren’t just for show. Each score opens up the surface, creating little pockets that catch the glaze. More surface area means more glaze sticks to the ham instead of sliding off into the pan.
The cuts also let the glaze seep below the surface, so the flavor goes deeper than a simple coating. As the ham roasts, the scored fat renders and drips out, and steam escapes through the cuts. Without them, moisture would trap under the skin, making the exterior soggy.
When you apply the glaze, press it into the cuts. You’ll see it pool in the diamond shapes.
After the first roast, the cuts will have opened further, ready for the second glaze. The result is a ham with crisp, caramelized edges and juicy meat underneath.
Two Glazes Build Better Caramel
Applying the glaze in two stages isn’t busywork. The first coat goes on after an hour of roasting.
You press it into the scored cuts, where it starts to flavor the meat as it cooks. That initial layer also begins to caramelize, forming a sticky base.
Half an hour later, the second coat adds a fresh, glossy layer on top. This second application caramelizes on the surface, creating a deep, mahogany sheen.
If you brushed on all the glaze at once, the sugars would scorch before the ham is done. Splitting it gives you control. You’ll see the difference: the first glaze sinks in, the second stays on top.
When the ham comes out, the glaze will be bubbly and dark in spots, not burnt. That’s exactly right.
The Rest Is Part of the Cooking
Pulling the ham from the oven and cutting it right away would waste all your work. During the roast, the heat drives juices toward the center.
If you slice immediately, those juices run out onto the cutting board, leaving the meat dry. A rest lets the internal temperature even out and the juices redistribute back into the muscle fibers. The carryover cooking also finishes the center, bringing it up a few more degrees.
After twenty minutes, the ham will be easier to carve and the slices will hold their shape. You’ll notice the meat looks uniformly moist, not dry at the edges. The glaze will have set slightly, making clean cuts.
That’s the reward for patience. So tent it loosely and walk away.
The ham will be better for it.
What Actually Matters in the Cart and on the Board
Bone-in ham, butt or shank: Butt end gives more even meat for slicing, shank has the bone handle, and either one at 8 to 10 lb fits the timing.
Honey: A light clover or wildflower honey keeps the glaze from tasting dark and overpowering the orange and cinnamon.
Brown sugar: Fresh, soft brown sugar dissolves cleanly in the saucepan; hardened lumps leave gritty spots that never smooth out.
Orange juice: Squeeze it fresh if you can, since bottled juice tastes flat once the glaze reduces on the ham.
Dijon mustard: Smooth Dijon, not grainy or yellow, blends into the honey and sugar without breaking the glaze’s texture.
The glaze is high in honey and brown sugar, both of which begin to caramelize well below the oven’s 325°F. If all the glaze is applied at once, the sugars sit on the ham’s surface for the full remaining bake time, eventually carbonizing into a bitter, blackened crust. Splitting the glaze into two applications means the first layer caramelizes while the second, fresher layer melts over it, keeping the surface glossy rather than burnt.
How to Read the Ham at Every Stage
Judging the glaze’s consistency before it hits the ham
The glaze needs to be fluid enough to brush but thick enough to cling. After about three minutes over medium heat, it should coat the back of a spoon and drip off in a slow ribbon. If it’s watery, it’ll run off the ham and burn in the pan; if it’s too thick, it won’t seep into the scores.
Adjust with a splash of orange juice or a few more seconds of cooking. You’re looking for the texture of warm honey, not syrup.
When the first glaze has set enough to take the second
After the initial 30 minutes with glaze, the surface should look tacky and slightly darkened, not wet. If it’s still sticky and pale, the sugar hasn’t begun to caramelize and the second coat will slide.
Give it a few more minutes. If it’s already dark brown at the edges, you’re ahead; pull it early and apply the second glaze at a lower temperature. The ham should smell nutty, not acrid.
The moment the internal temperature hits 125°F
At 125°F, the ham is done. Carryover cooking will take it a few degrees higher during the rest, so pulling it at 125°F ensures juicy meat. If you wait until 135°F, the outer layers will dry out.
Check in the thickest part, avoiding the bone, which conducts heat and can give a false high. The probe should slide in with little resistance, and the juices should run clear with a hint of pink.
Reading the rest: when the juices have redistributed
During the 20-minute rest, the ham’s internal temperature will even out and the juices will settle. You’ll know it’s ready when the surface is no longer steaming and the glaze has firmed up. If you cut too soon, the juices will flood the board and the meat will be dry.
A quick test: press the center with a finger; it should feel firm but yield slightly. The wait is what keeps the slices moist.
Baked Bone In Ham with Honey Glaze
Ingredients
Method
- Allow the ham to stand at room temperature for no less than 1 hour.
- Set oven to 325°F (165°C).
- Cut ½ inch deep scores into the ham in a diamond pattern. Set it flat side down on a rack inside a shallow roasting pan and roast for 1 hour.
- In the meantime, stir together all glaze components in a small saucepan over medium heat, whisking until uniform, about 3 minutes.
- Take ham out of oven, coat with half the glaze, pressing it into the scored cuts, and roast 30 minutes.
- Take ham out of oven, apply glaze again, and roast another 30 minutes.
- After 2 hours, verify internal temperature; it must register at least 125°F (50°C) at the center, steering clear of the bone.
- When the ham hits 125°F (50°C), take it out of oven, drape loosely with foil, and let rest at least 20 minutes prior to carving.
What You Can Swap in the Glaze and What to Leave Alone
Honey: Maple syrup, same amount (1/4 cup). The glaze will taste more like maple and less floral.
It’s a bit thinner, so expect it to run off the ham a little more; you might need to cook it down for an extra minute to get it to cling. The color will be slightly darker, but it still works.
Dijon mustard: Yellow mustard, same amount (1 tbsp). Yellow mustard brings a sharper, more vinegary bite and less of that smooth, creamy background. The glaze will still thicken and cling, but the overall flavor will be more assertive.
If you’re feeding kids, they might notice the sharper tang.
Brown sugar: Granulated sugar, same amount (3/4 cup). The glaze won’t have that deep molasses note, and it will be a bit sweeter and less complex.
It’ll still caramelize, but you’ll miss the richness. If you only have granulated, add a teaspoon of molasses if you have it.
Bone-in ham: Boneless ham or spiral-cut ham. Don’t do it.
A boneless ham will cook faster and dry out because there’s no bone to slow the heat. A spiral-cut ham is already sliced, so the glaze will seep into every cut and the meat will dry out even faster. Stick with bone-in butt or shank.
Storage and Serving: The Glaze Window
That honey glaze is sugar, and sugar changes in the fridge. Within a day the surface turns tacky, and by day two it’s sticky enough to cling to foil and your fingers. The meat stays moist, but the gloss fades as moisture migrates from the ham into the coating.
Eat it within two hours of resting for the best texture: the glaze is still lacquered and the slices firm. Leftovers keep three to four days in an airtight container, though the surface softens each day. Reheat covered at 300°F (150°C) until just warm, about 15 minutes for a portion, which revives some gloss without drying the meat.
Cold slices work in sandwiches, where the sticky glaze is an asset. Freeze only the meat, not the glazed exterior; the coating weeps and turns grainy when thawed.
Wrap sliced ham tightly for up to two months, thaw overnight in the fridge, and reheat covered. Add any finishing touch, like a drizzle of warm honey, right before serving, never during storage.
Tips
- Insert the probe into the thickest part of the butt or shank, roughly 2 to 3 inches from the bone, and slide it in at a slight angle so the tip sits in muscle rather than fat or connective tissue. Fat reads cooler and the bone reads hotter than the meat around it, so a probe that touches either one gives you a number that isn’t the ham’s, and you’ll either pull it early or keep roasting past 125°F (50°C).
- If you’re unsure the probe is clear of the bone, take a second reading an inch or two away in the same thick section. Two readings within a few degrees of each other mean you’re in solid muscle; a wide gap means one probe is sitting against bone or in a fat pocket, and the lower number is the one to trust for deciding when to pull the ham.

Frequently Asked Questions
Can I glaze the ham ahead of time and bake it later?
You can build the glaze and hold it, but don’t coat the ham before it goes in. The glaze is sugar, and sugar sitting on raw ham in the fridge pulls moisture out of the meat and turns runny, so it slides off in the pan instead of clinging to the scores. Stir it together on the stove and keep it covered in the fridge, then warm it back to a brushable consistency when the ham comes out for its first coat.
A cold, set glaze won’t press into the diamond cuts the way a warm one does. The ham itself needs no advance prep beyond sitting out for an hour.
Why did my ham turn out dry even though I followed the recipe?
Most often the probe went in too close to the bone, which reads hotter than the meat around it, so you pulled the ham thinking it was done when the center was still climbing, or the reverse and you kept it in past 125°F. Slide the thermometer into the thickest part of the muscle, well clear of the bone, and check in two spots if you’re unsure. A second cause is carving straight out of the oven: the slices look fine for a minute, then the board floods and the meat goes tight and dry.
Let it sit under loose foil for the full 20 minutes. If your oven runs hot, the outer inch will overcook before the center ever reaches temperature.
How is a baked bone-in ham with honey glaze different from a spiral-cut ham?
A spiral-cut ham arrives pre-sliced, and every one of those cuts is an open door. Glaze runs down into all of them, which sounds good until you realize the same cuts let moisture escape from the interior during the two hours in the oven. The outside edges dry and toughen while the middle stays wet, and you end up with uneven slices.
A whole bone-in ham keeps its surface intact, so only the scored diamonds take on glaze and the meat underneath stays protected. You also get to control how thick each slice is.
Do I need to baste the ham while it bakes?
No. The two glaze applications replace basting, and adding more brushstrokes between them just opens the oven door and drops the heat.
Each coat goes on at a set point, the first after an hour and the second 30 minutes later, pressed into the cuts rather than painted over the top. The bone and rendering fat keep the interior moist on their own. If you want more glaze character, spoon the pan drippings over the slices after carving instead of during the roast.
Opening the oven to baste also risks scorching the sugar that’s already set.
